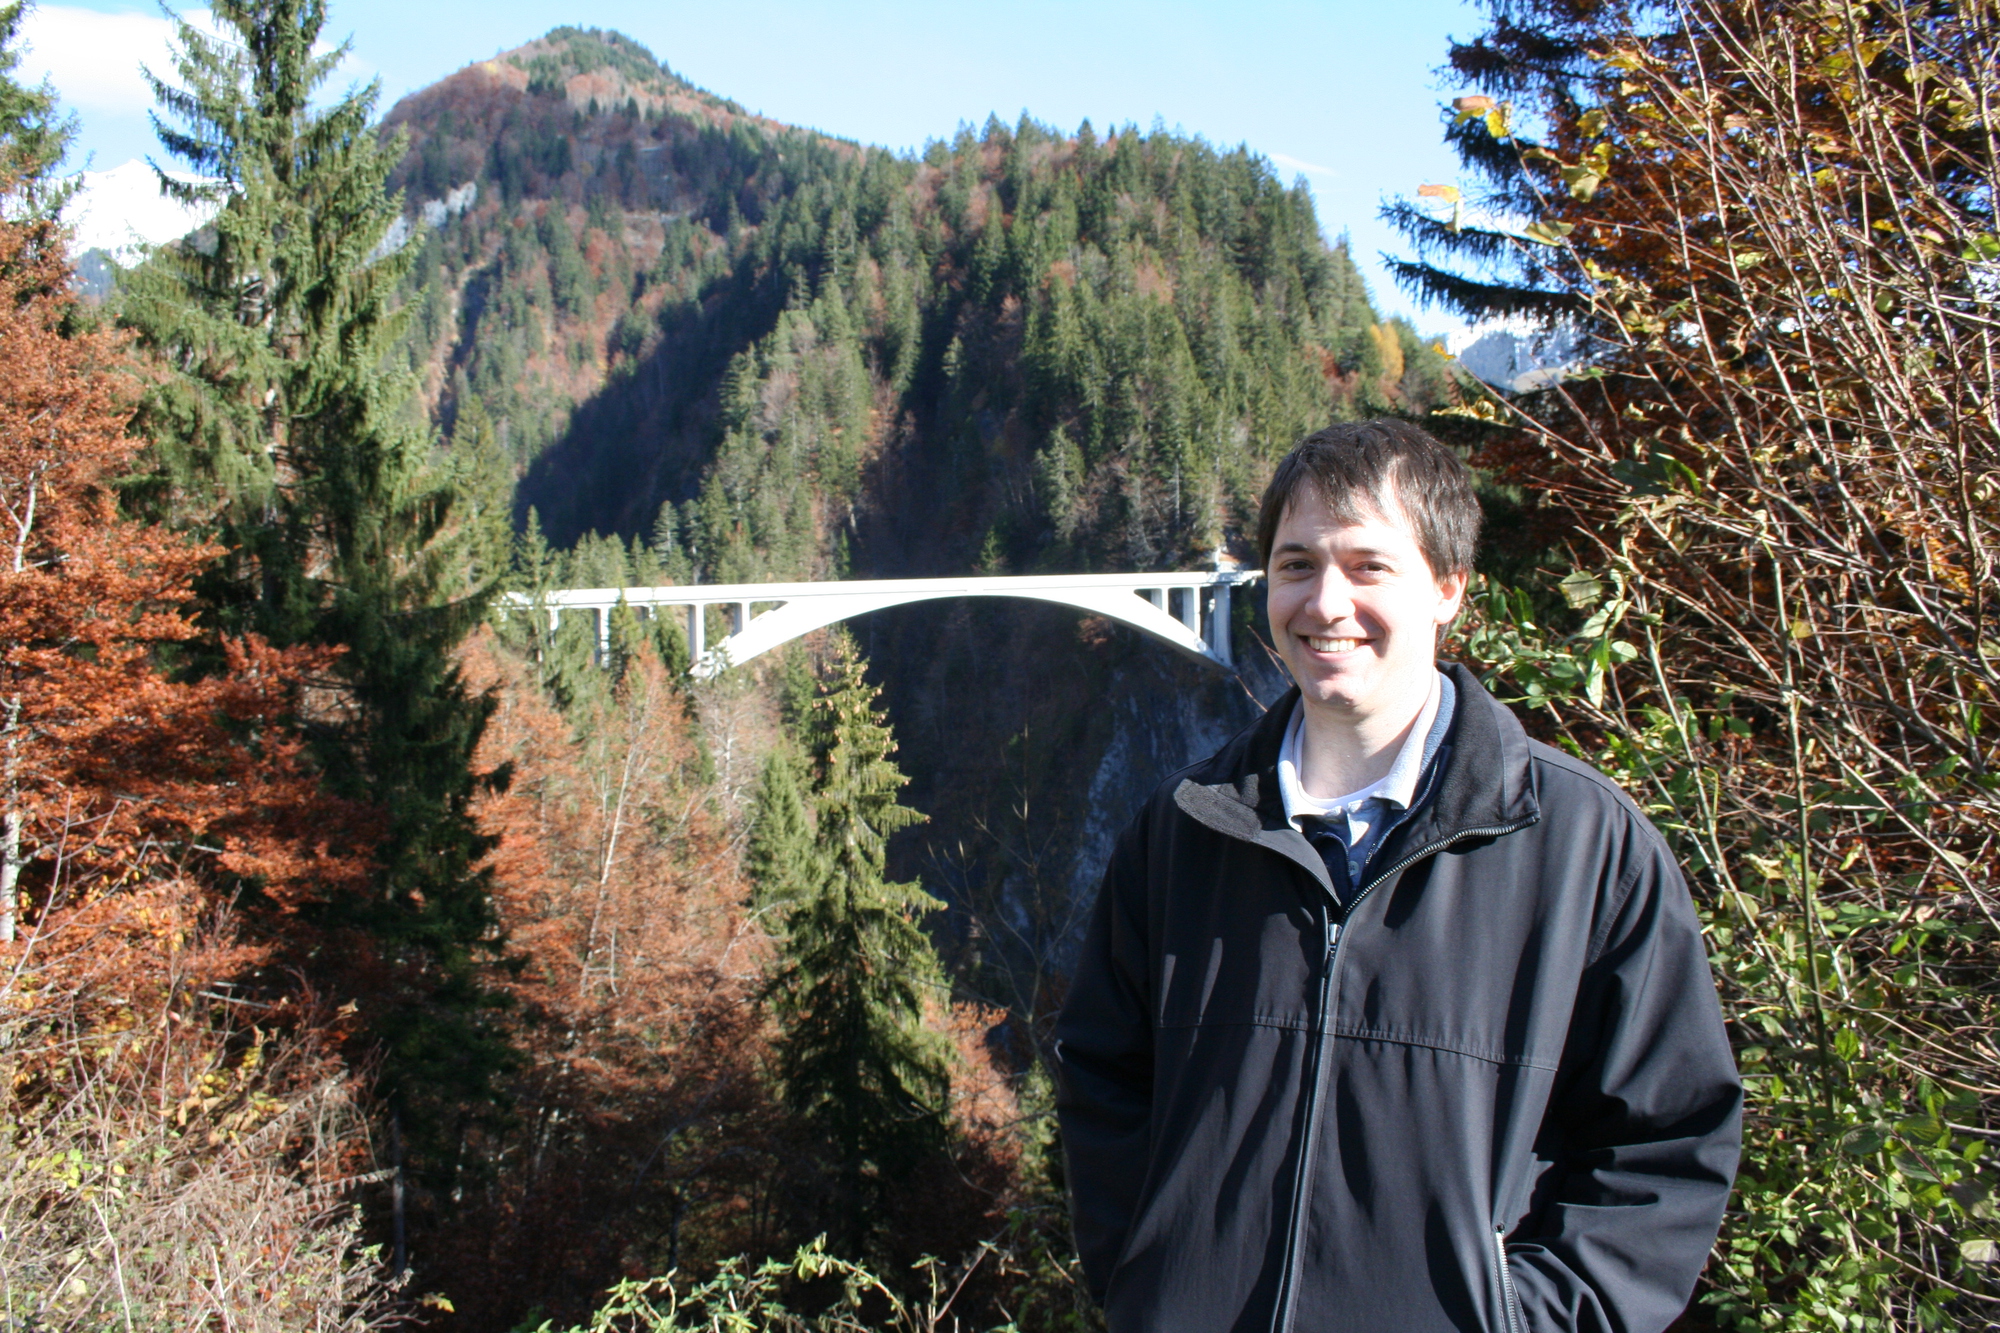
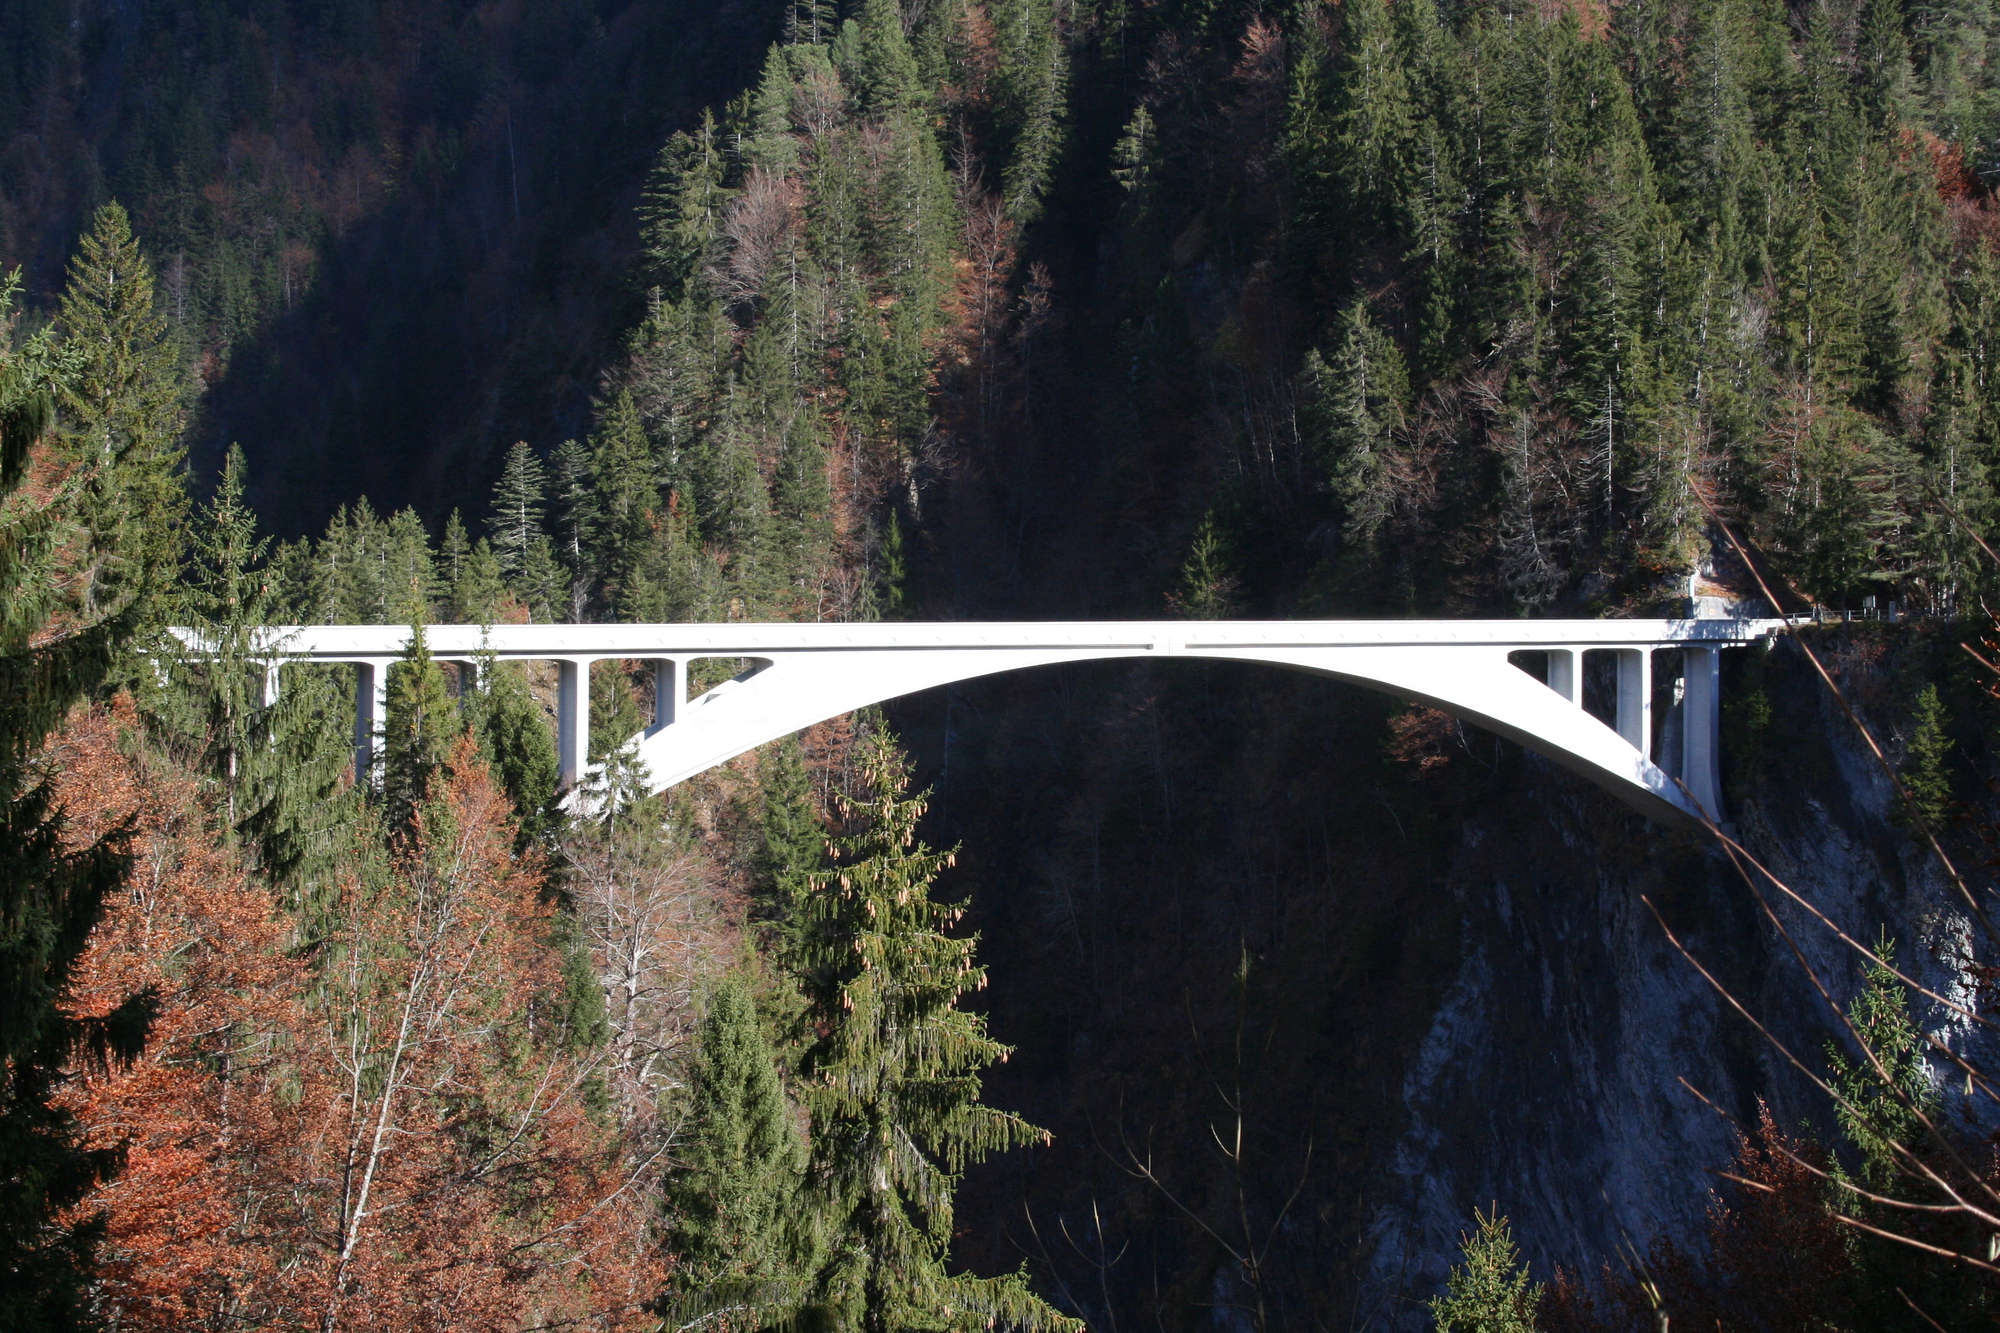
I first encountered the Salginatobel Bridge, and its designer, Swiss engineer Robert Maillart in Professor Billington’s class in college. I liked it so much that when I travelled to Switzerland on a work trip in 2009, I convinced three colleagues to drive out there with me (we also stopped by Christian Menn’s Sunniberg Bridge).
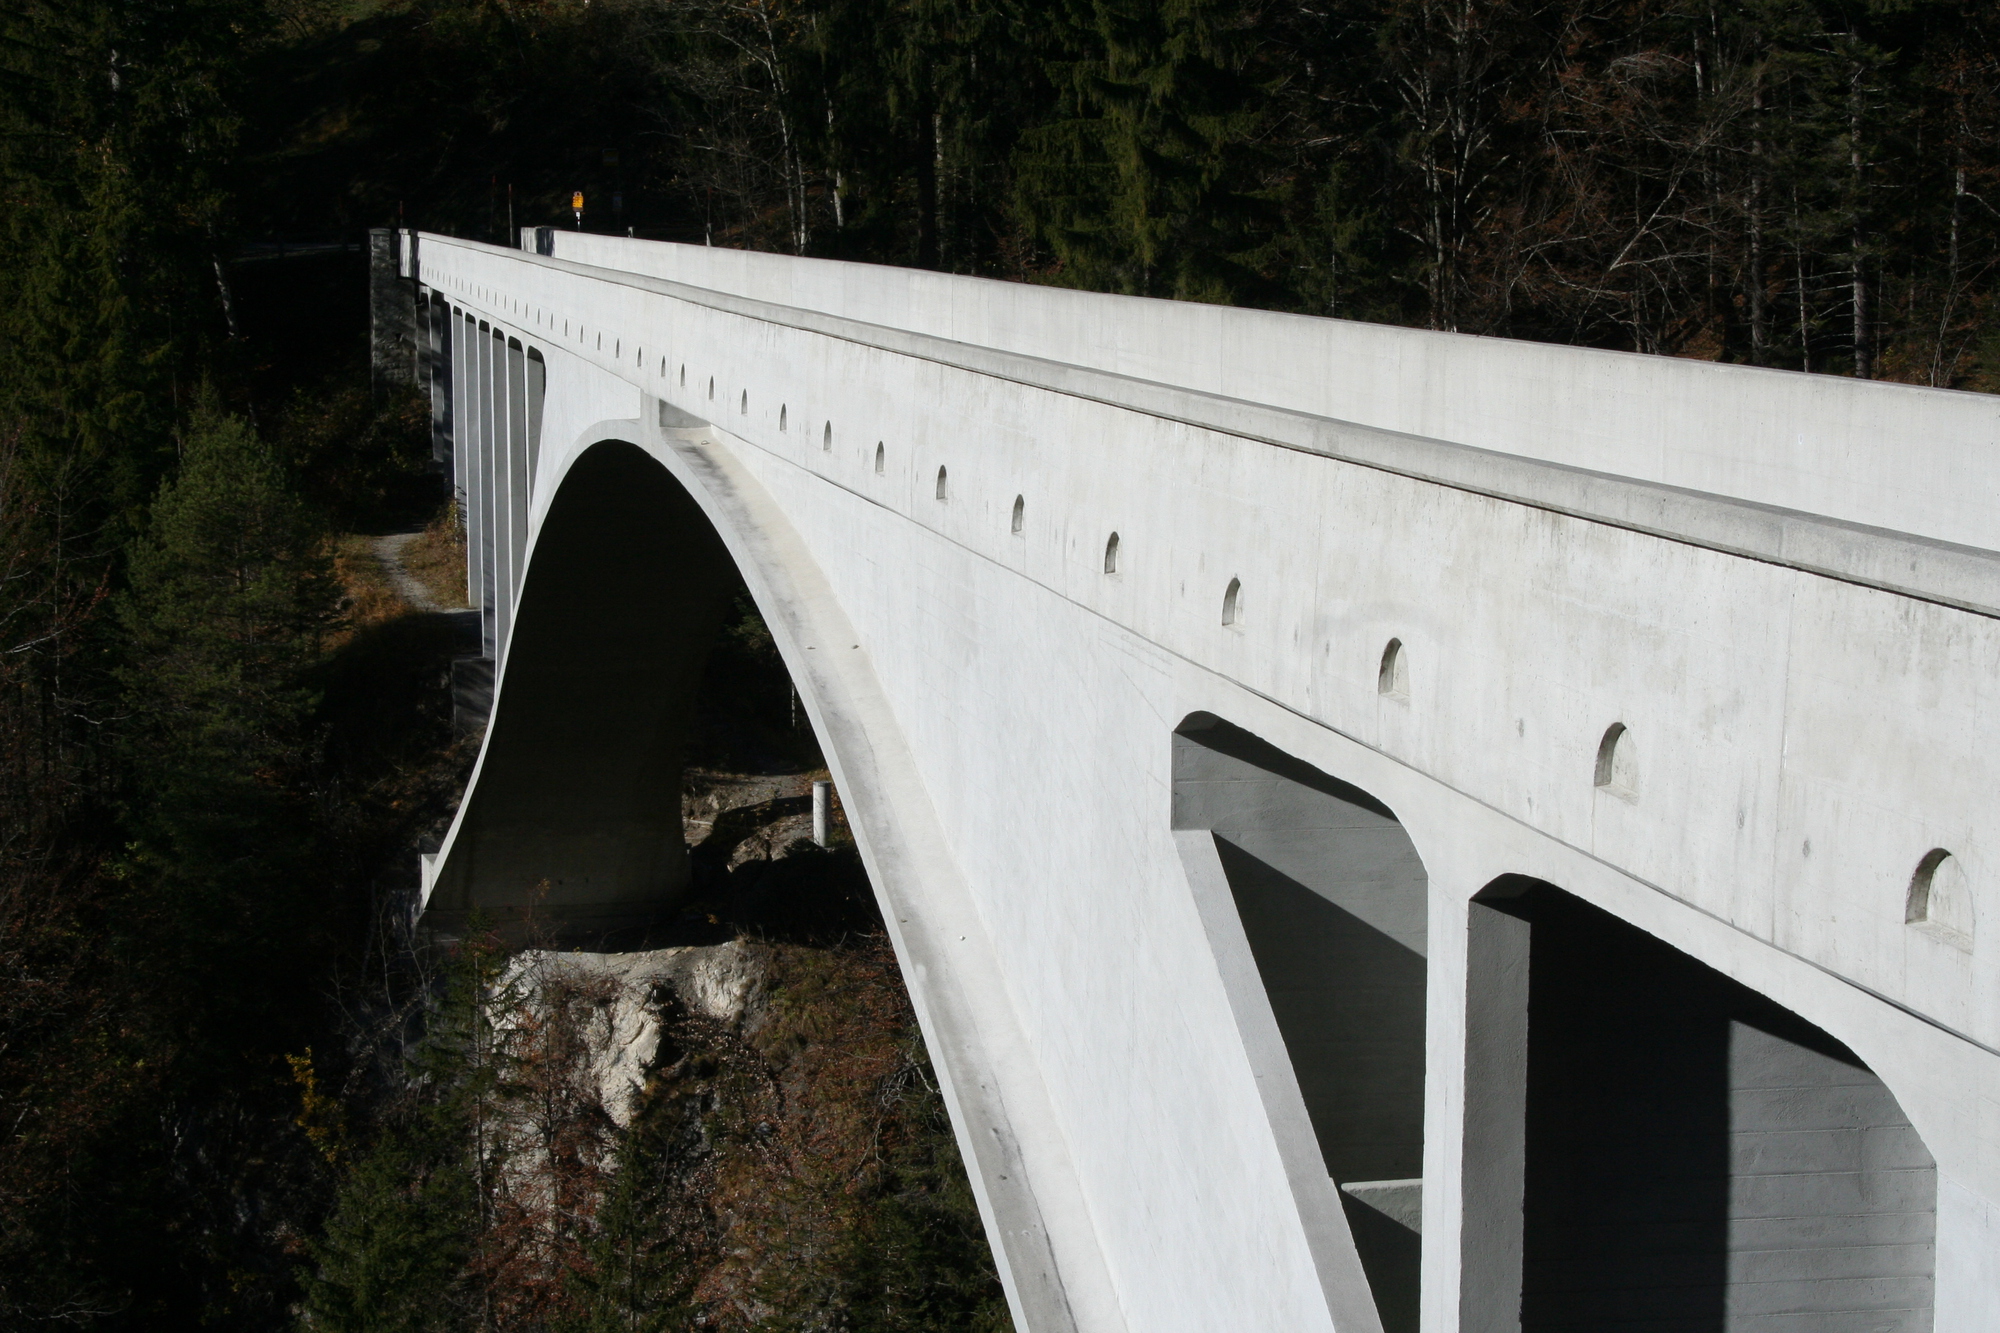

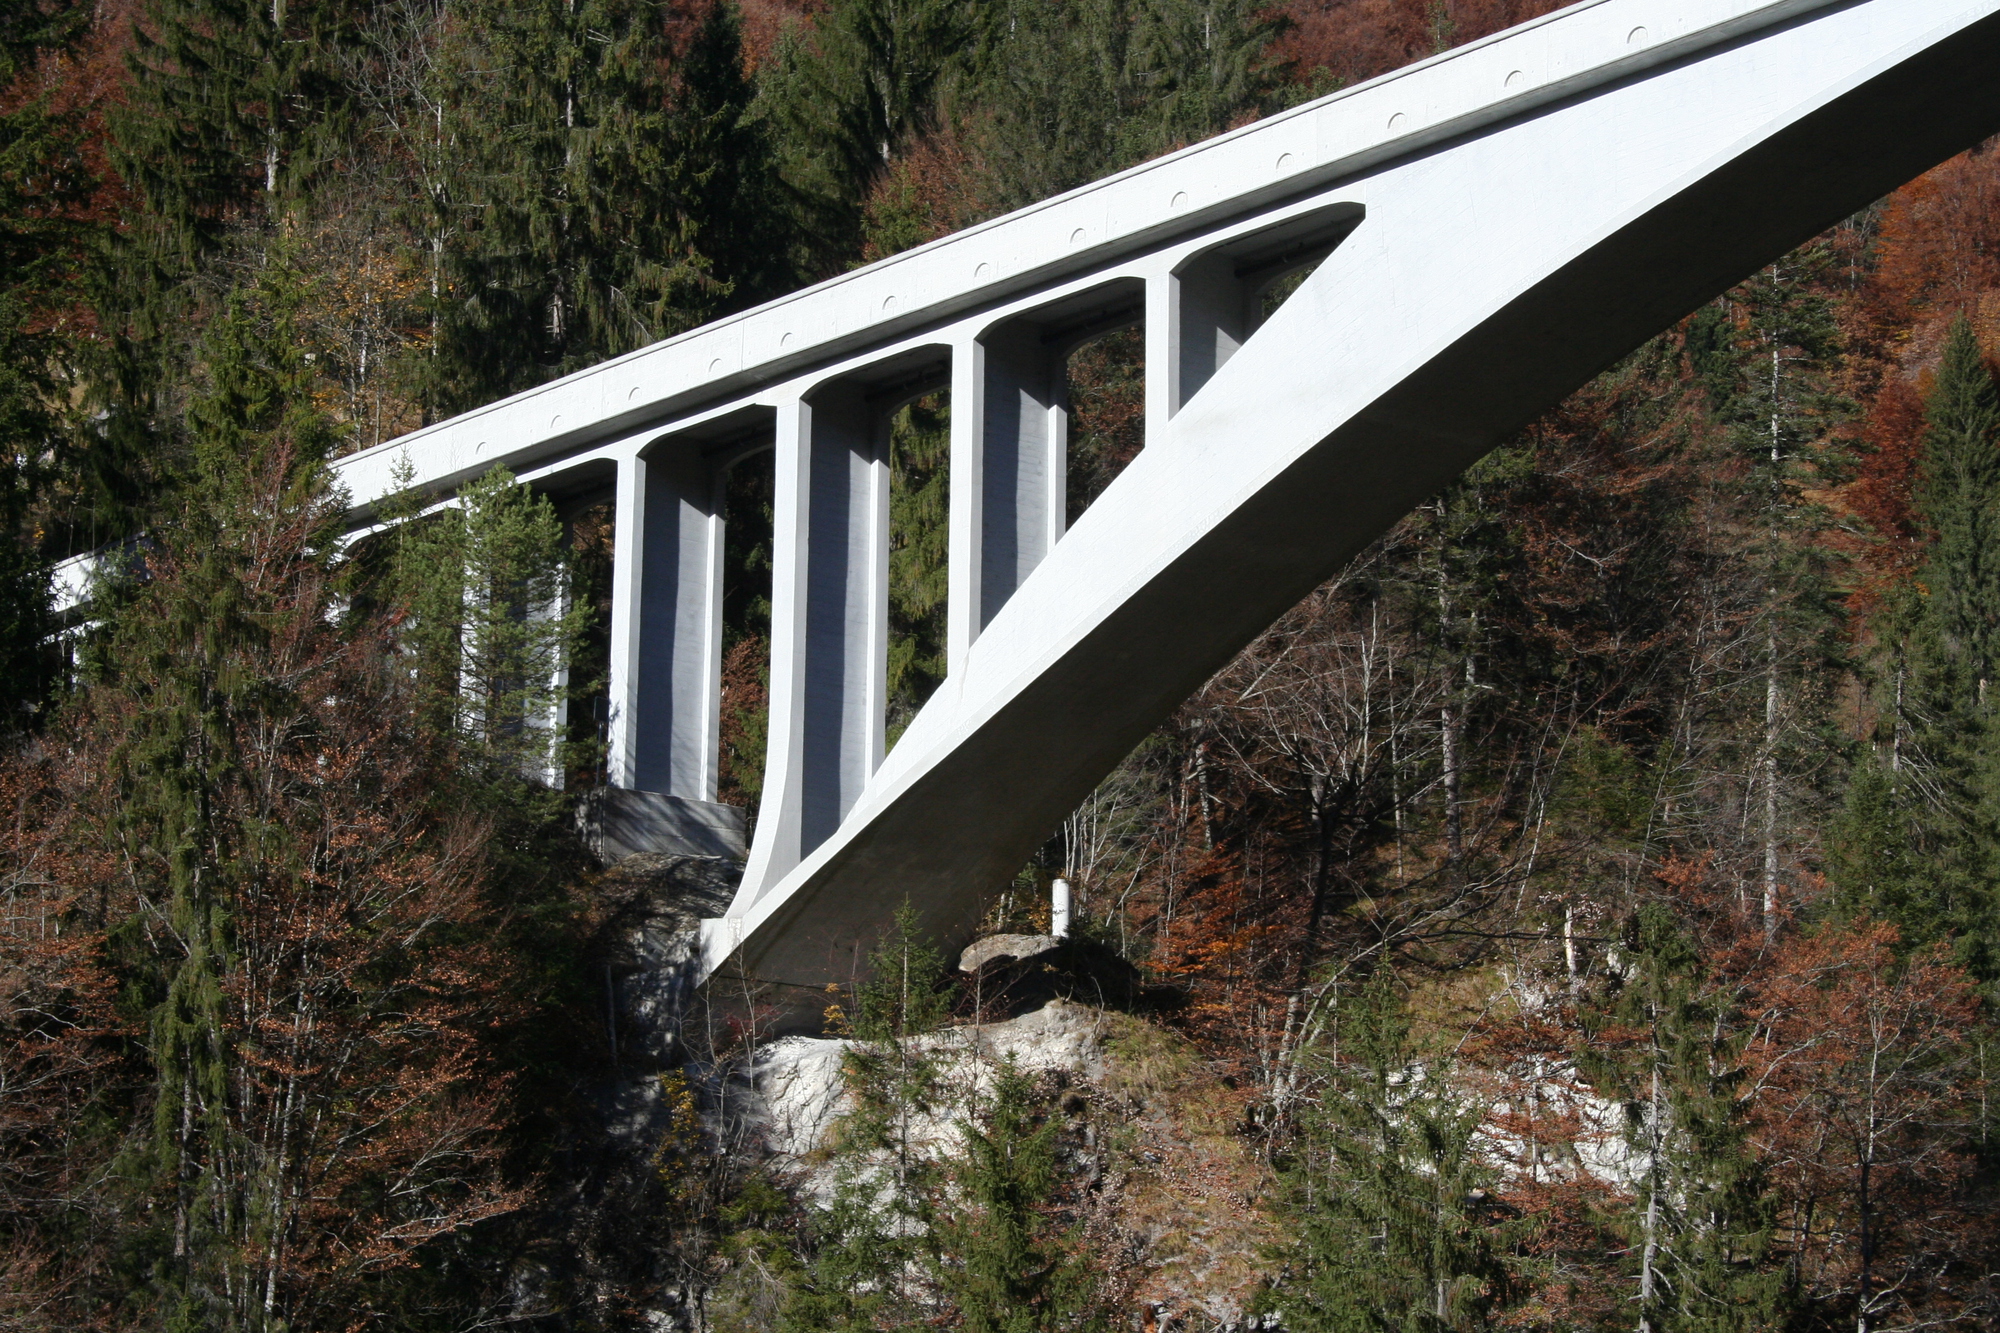
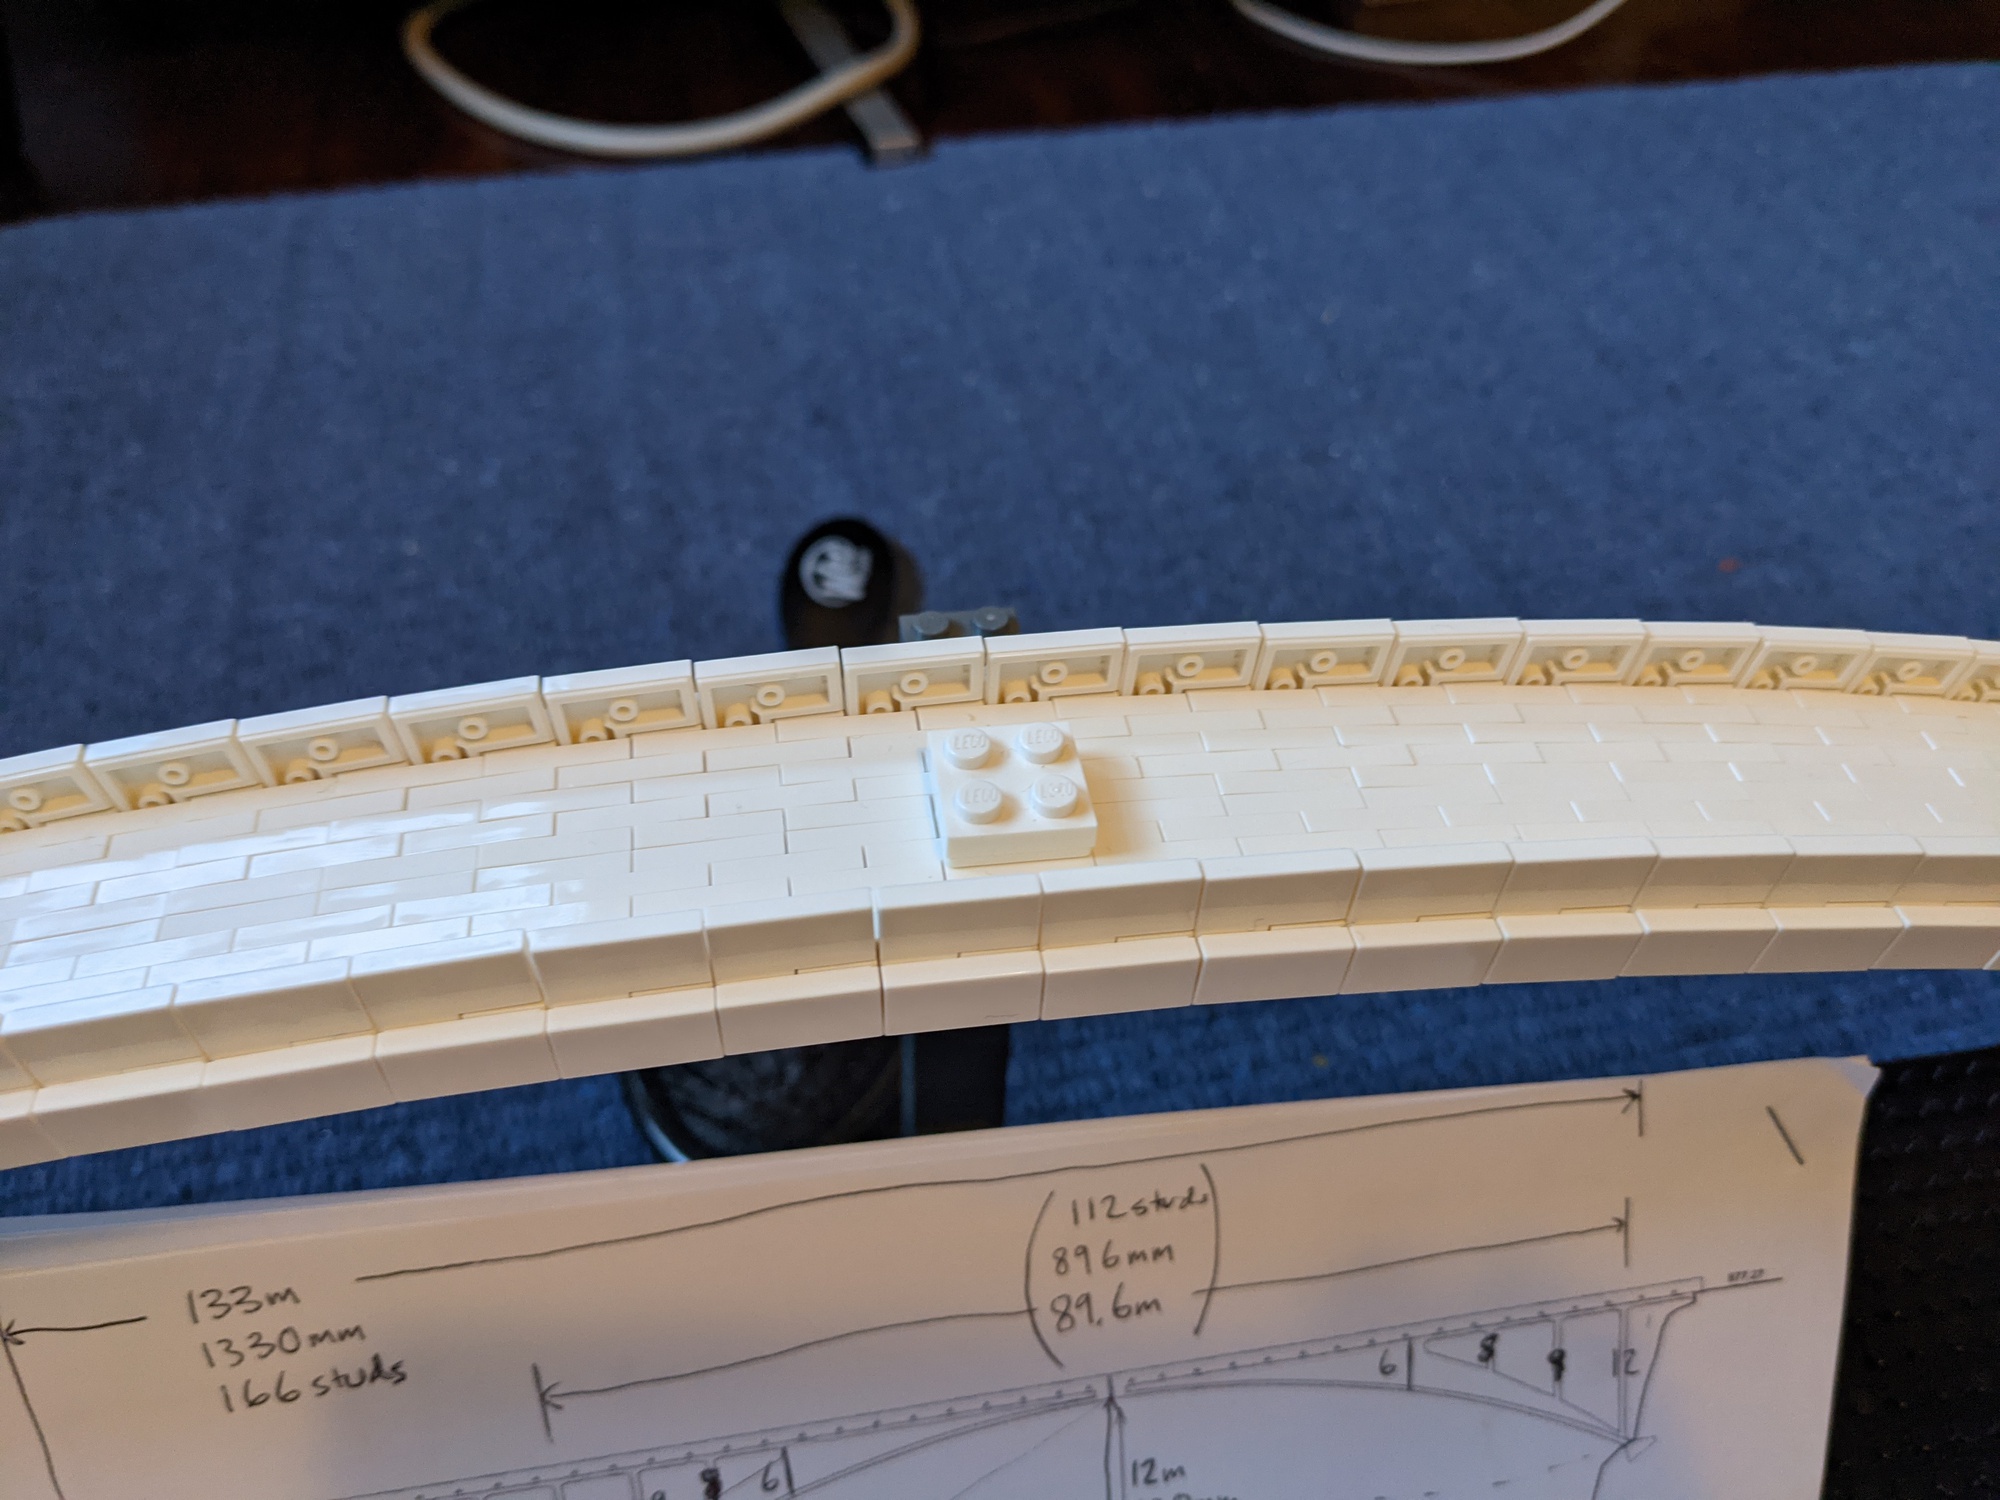
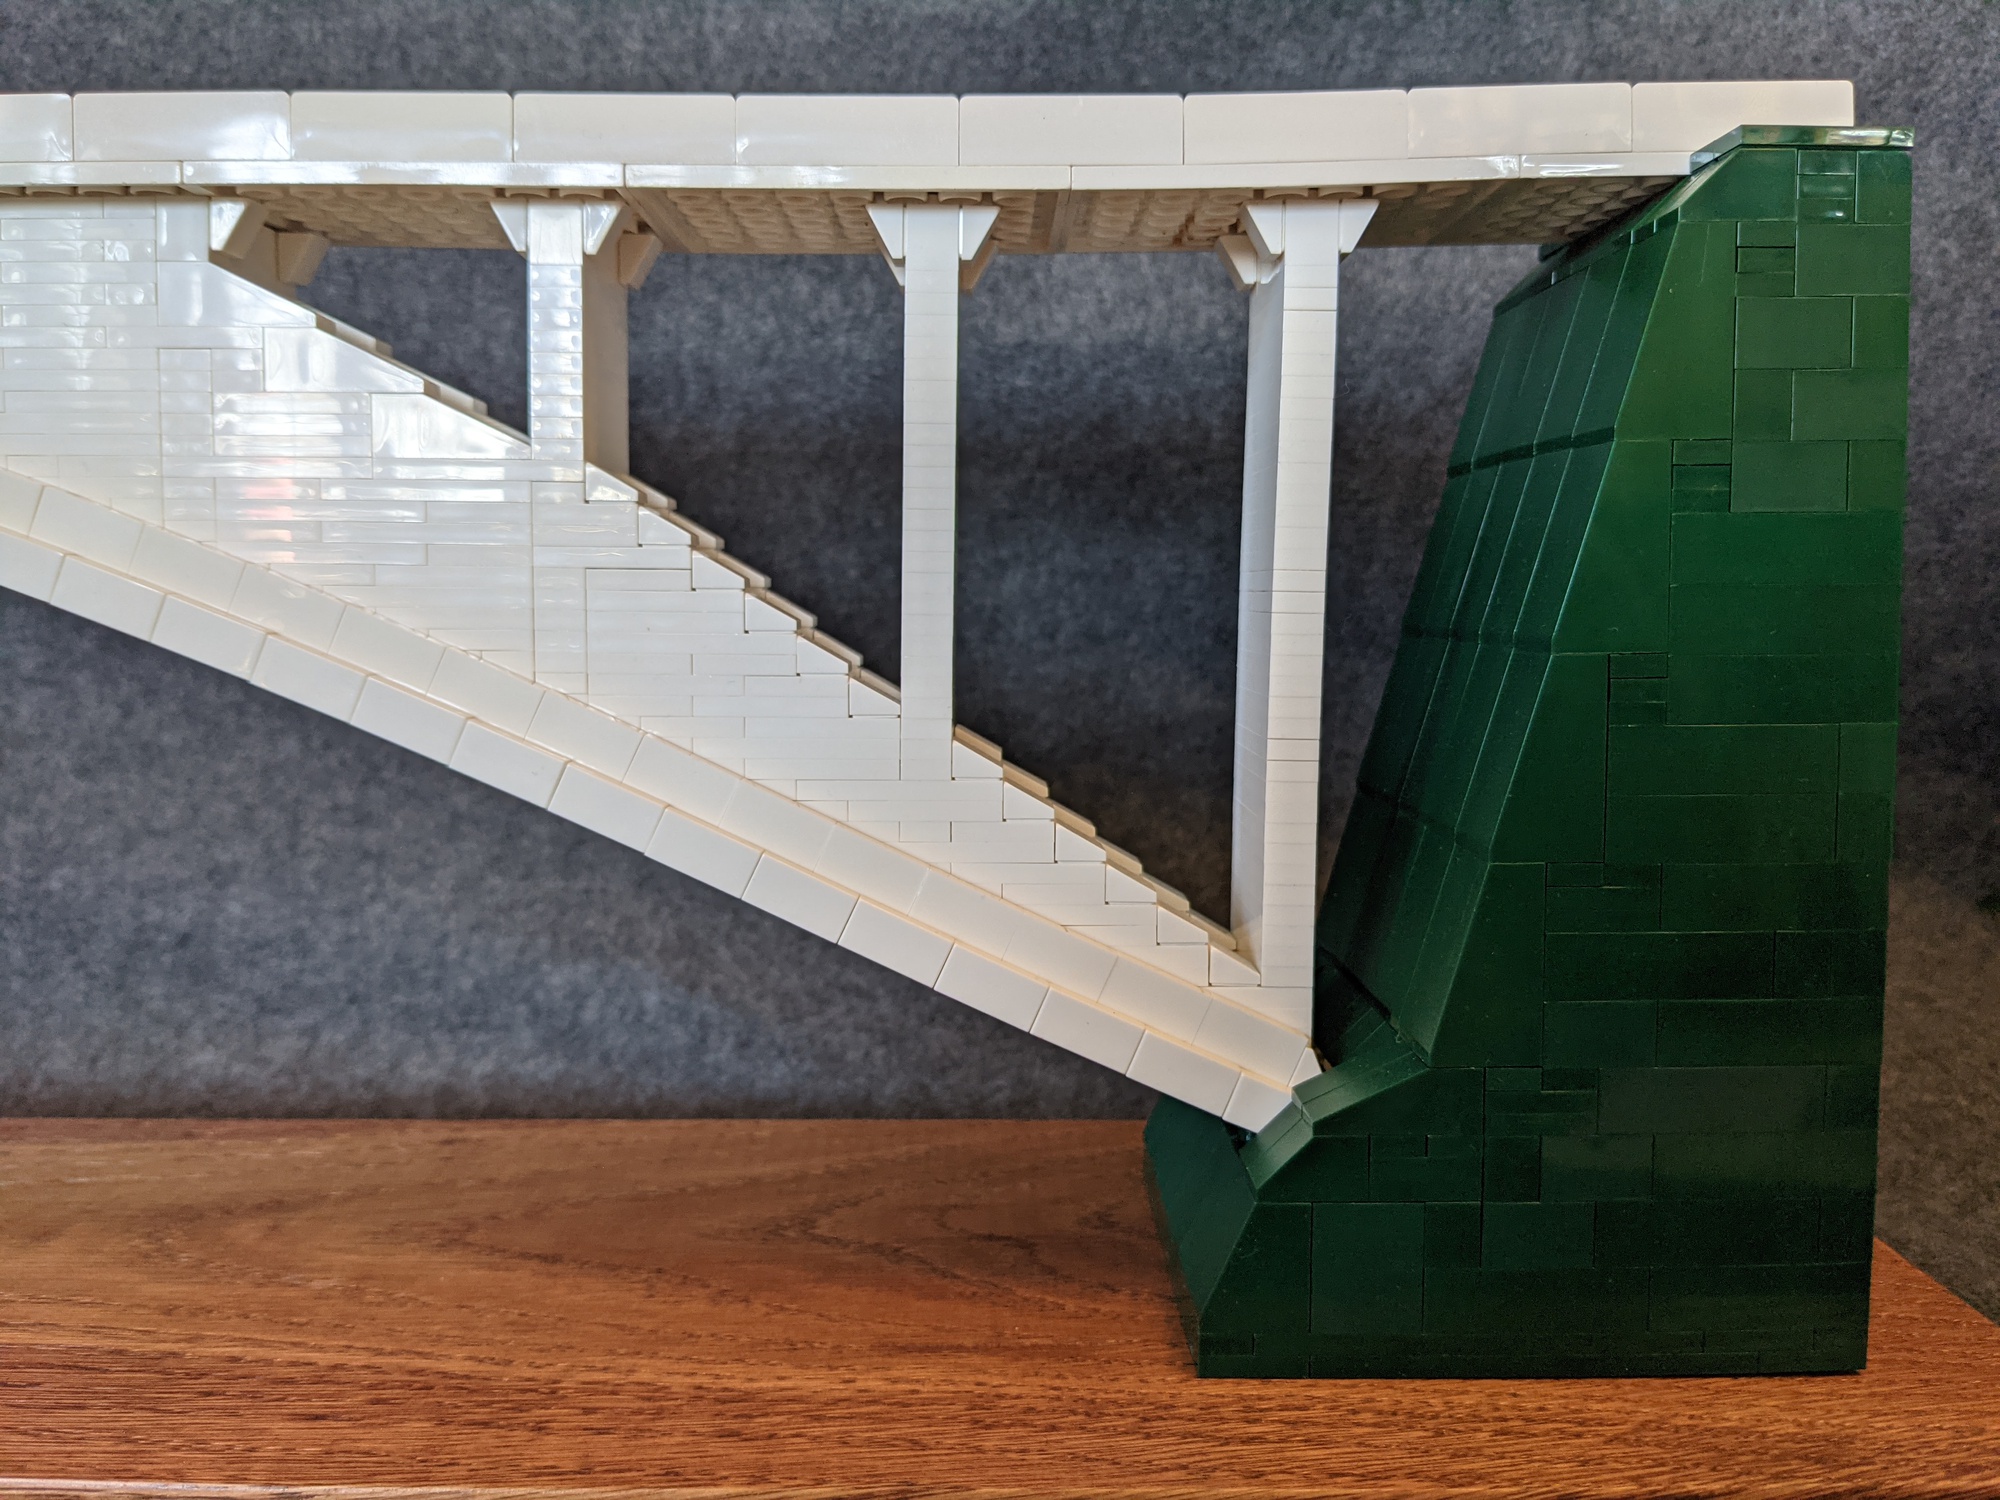
Recreating the smooth underside of the arch was the central design challenge. The arch is very shallow and its shape is critical to the elegance of the shape; building it out of actual inverted slope pieces would not do it justice. Instead, I constructed the arch out of 1x2 plates (imagine building a traditional brick wall, with alternating layers of bricks, and then turning it sideways) The entire assembled wall is deformed into a curve by taking advantage of the small rotational give at each connection point. Over the full distance spanned by the arch, these small rotations add up to substantial curvature. I had first played with this technique about ten years earlier after seeing it on a blog post (which I’ve now lost).
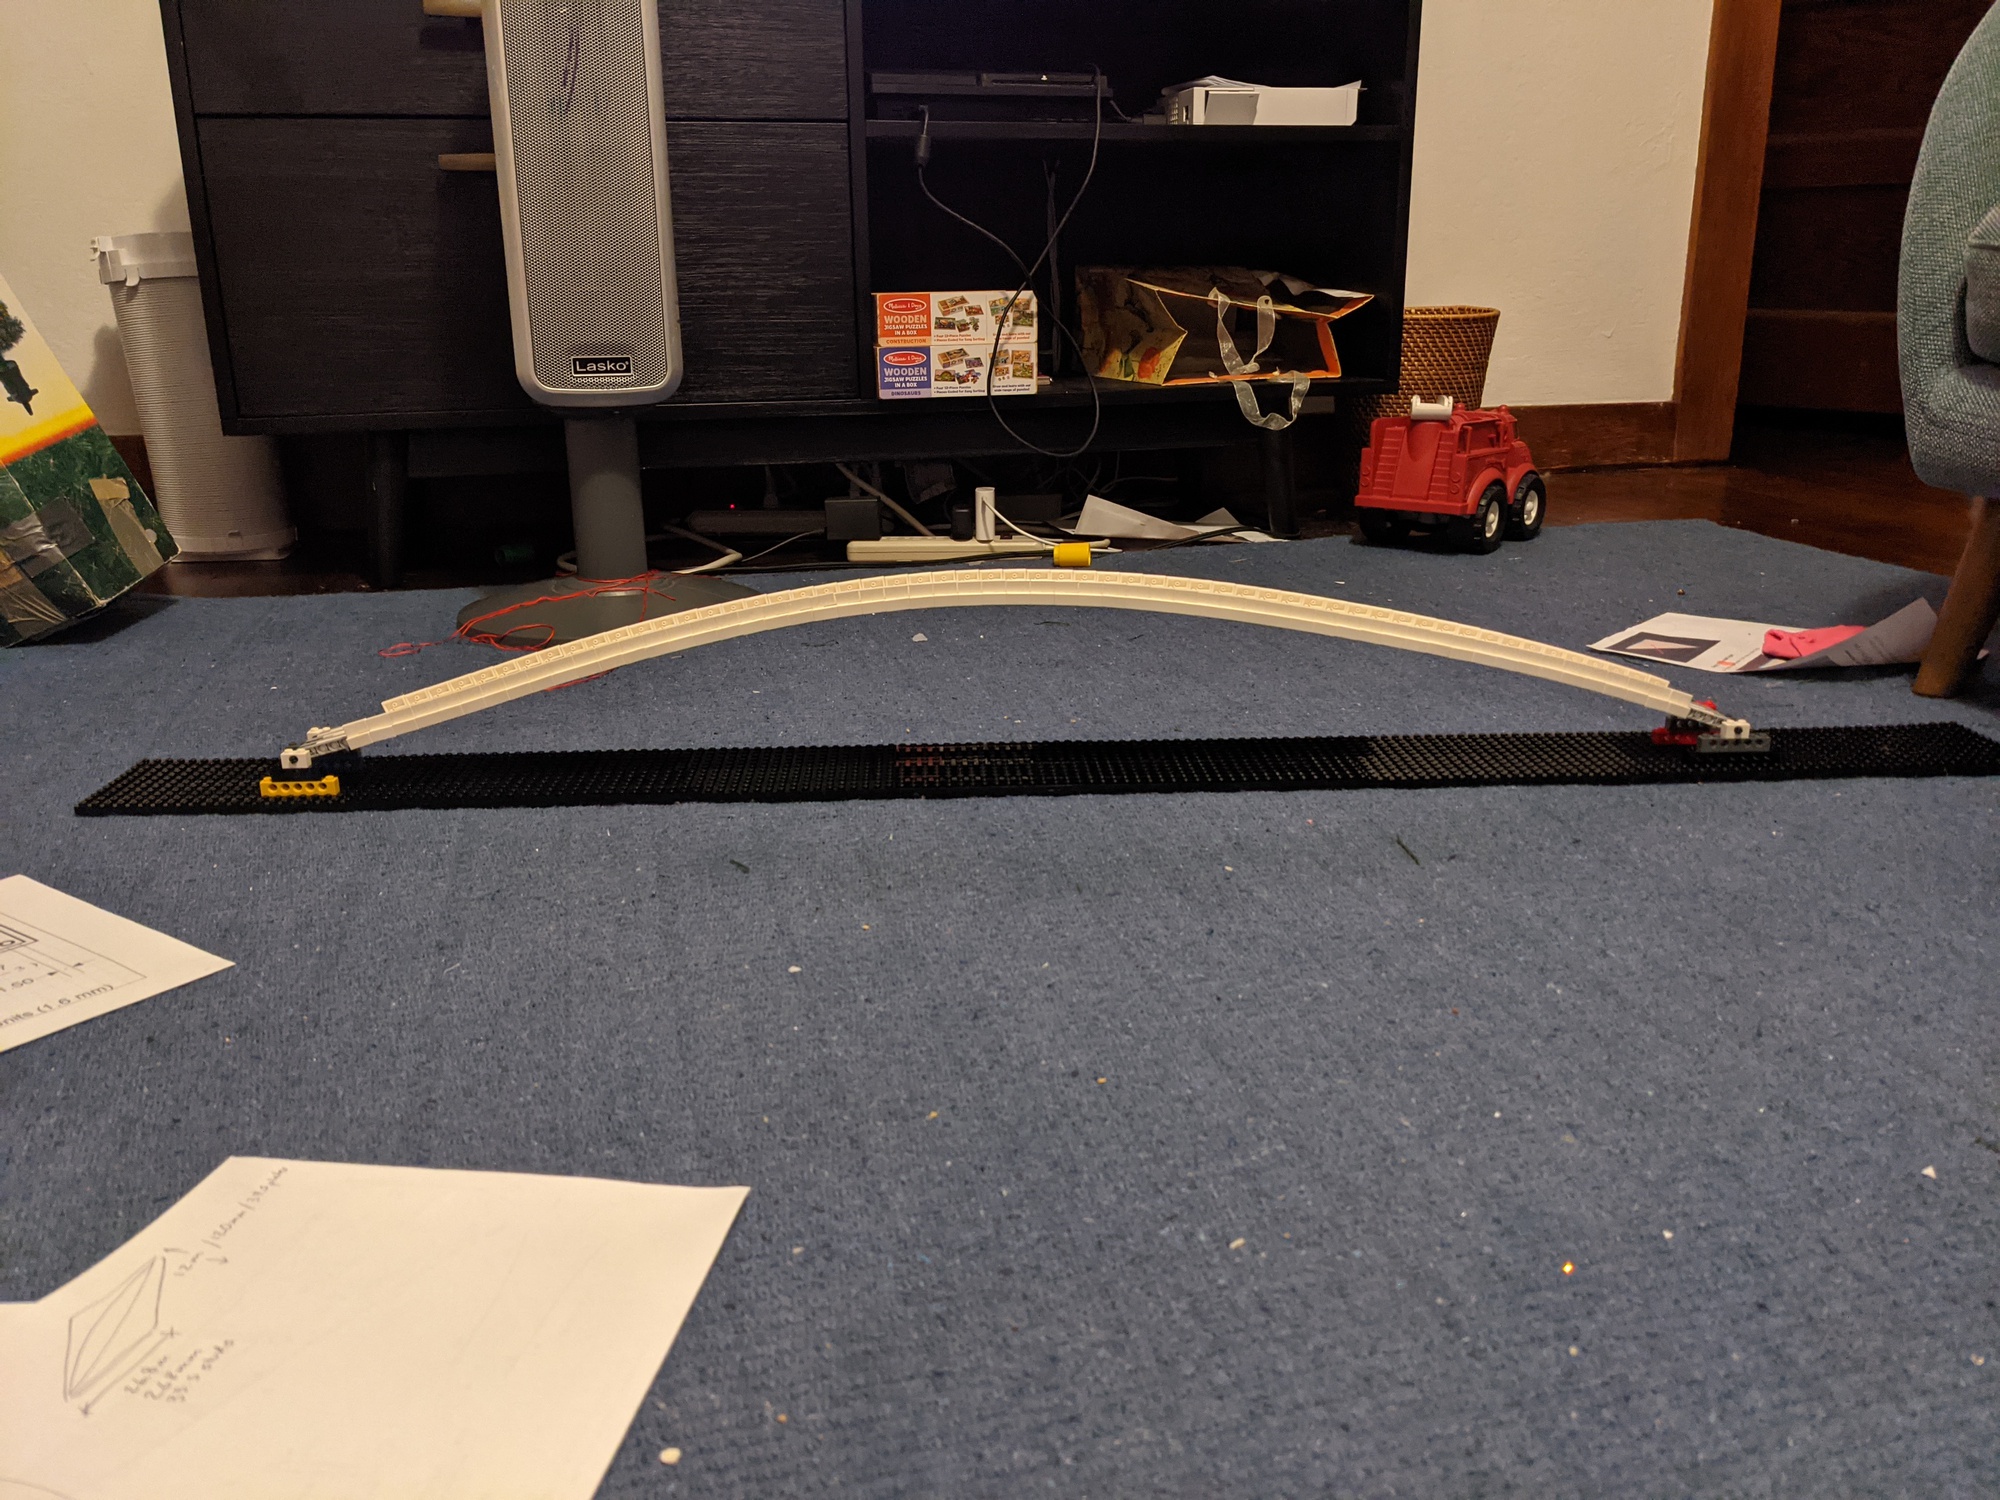
At each end of the arch, the plates connect to Technic plates through which an axle is threaded (in early prototypes I used thin liftarms, but these are not actually the correct width).
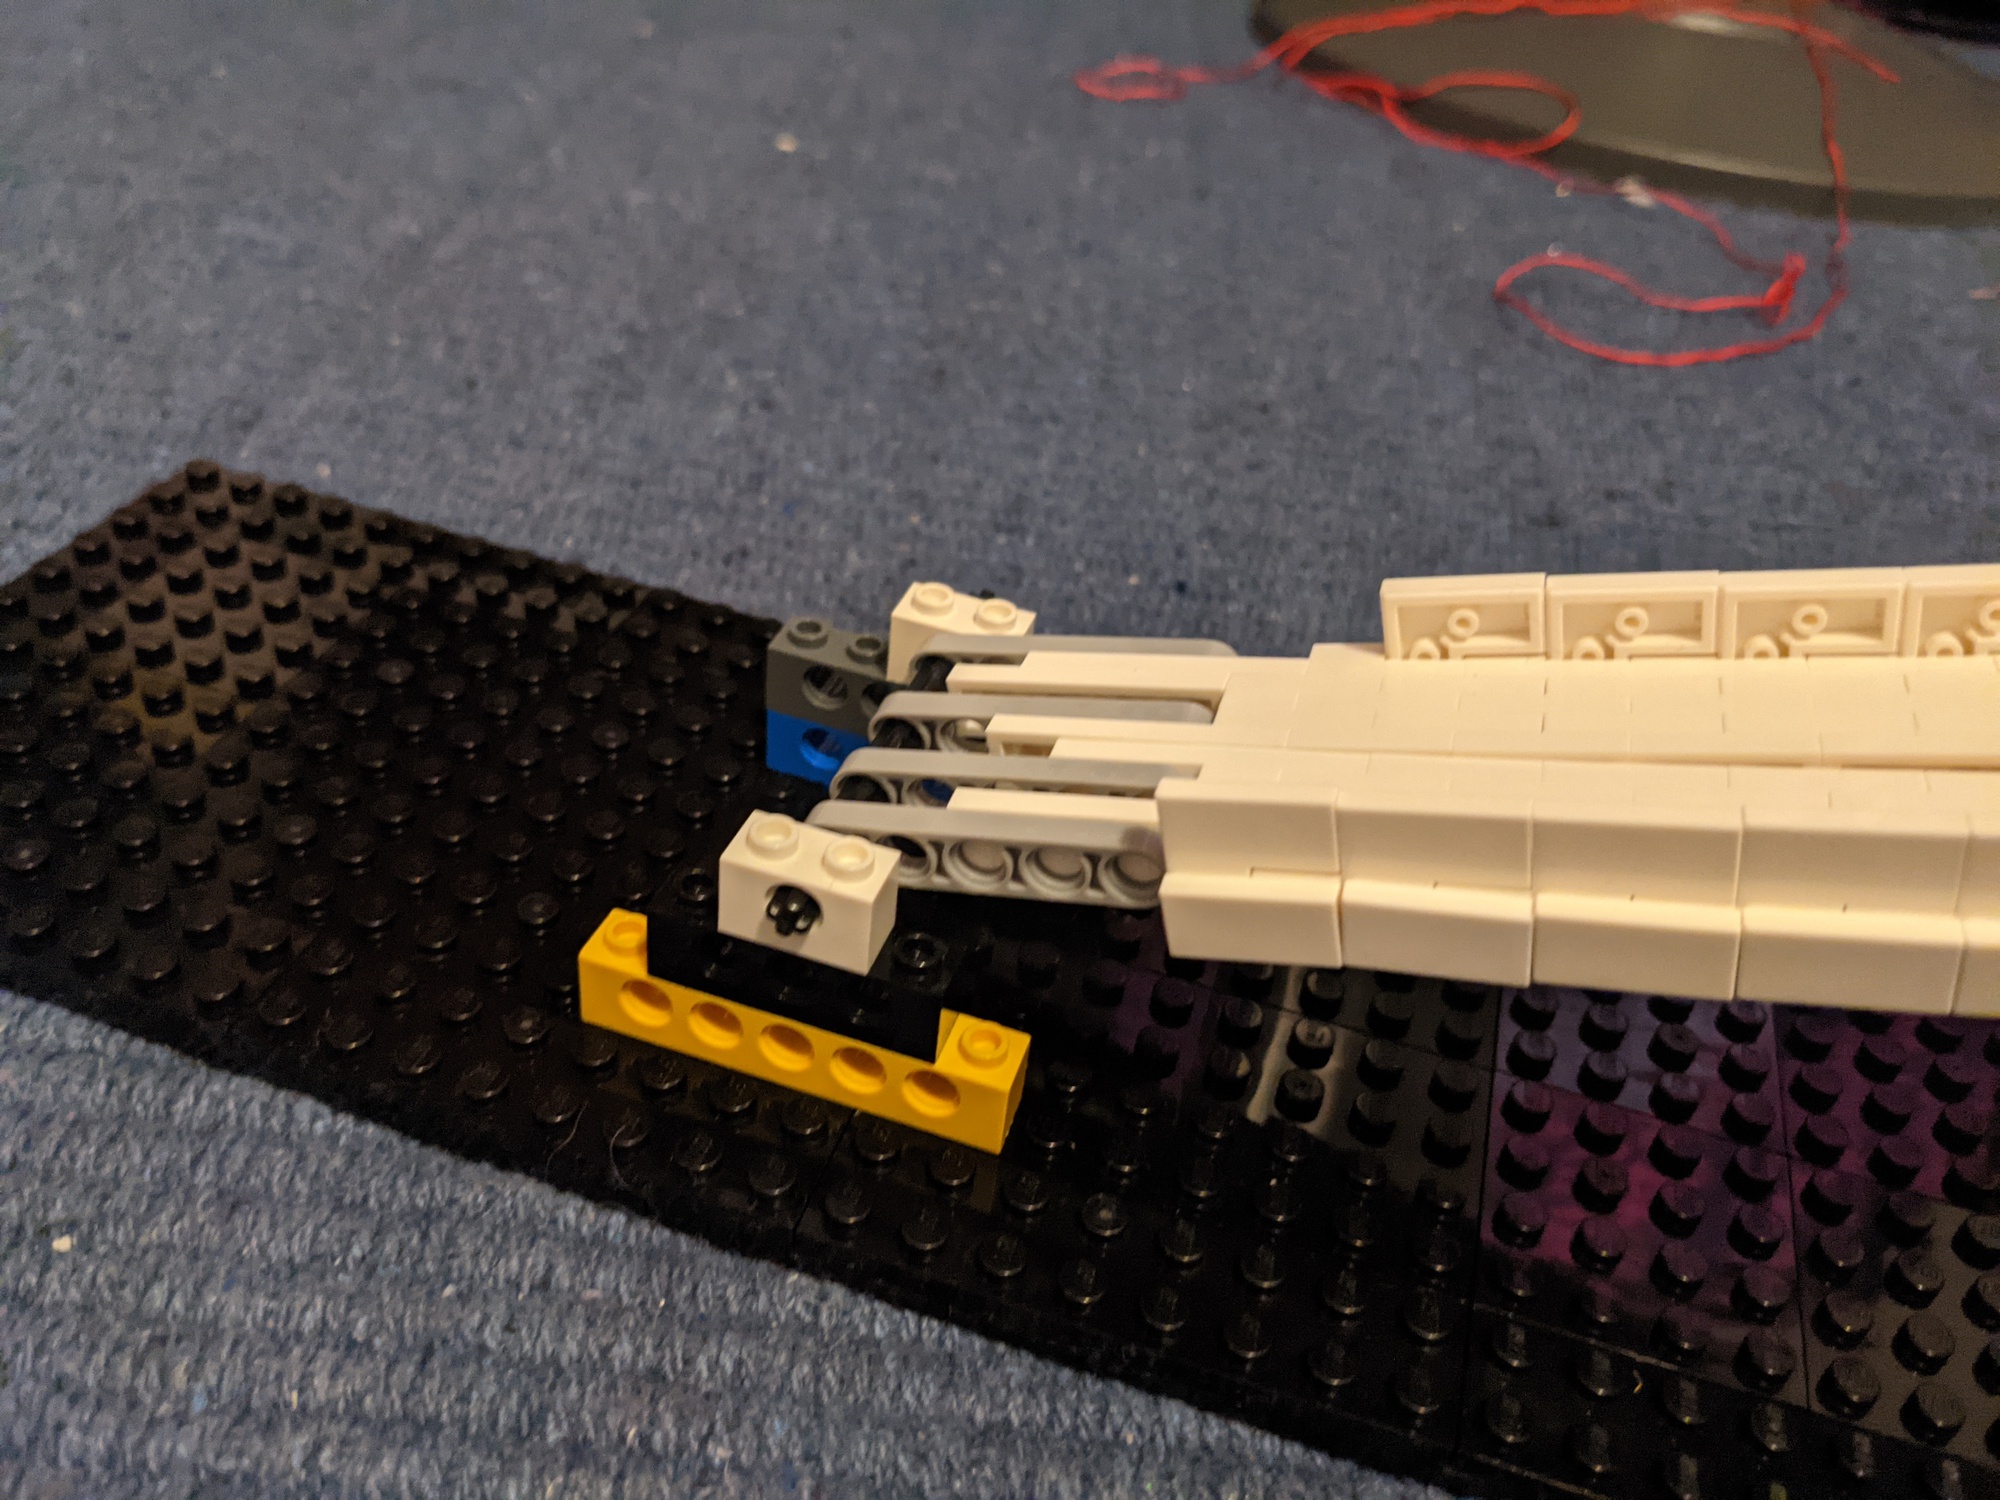

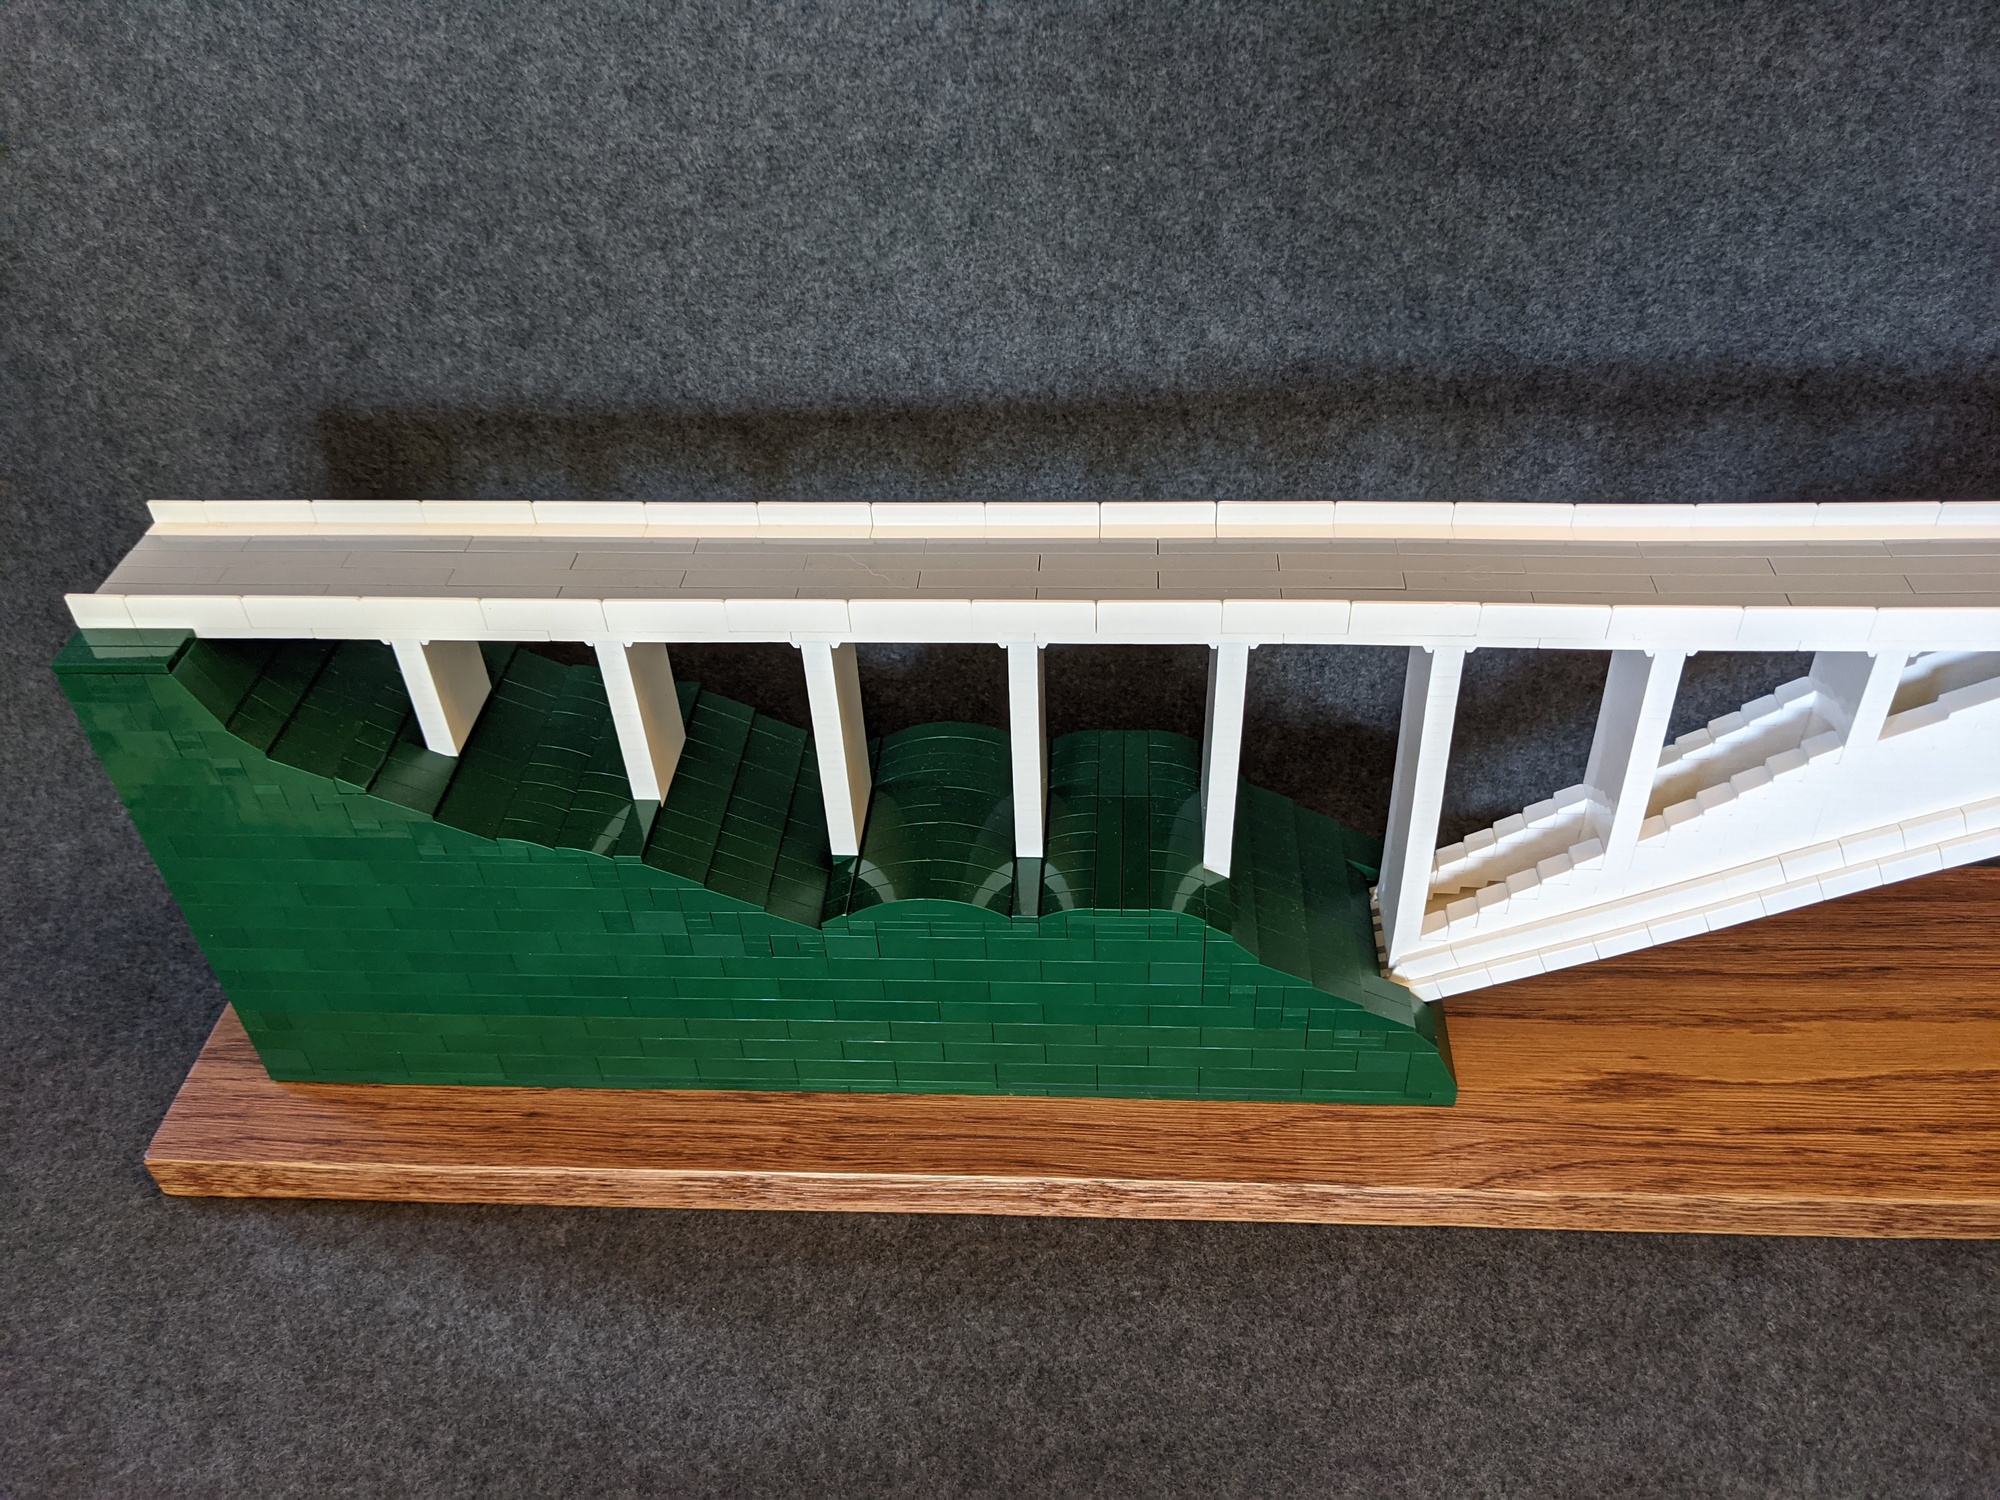
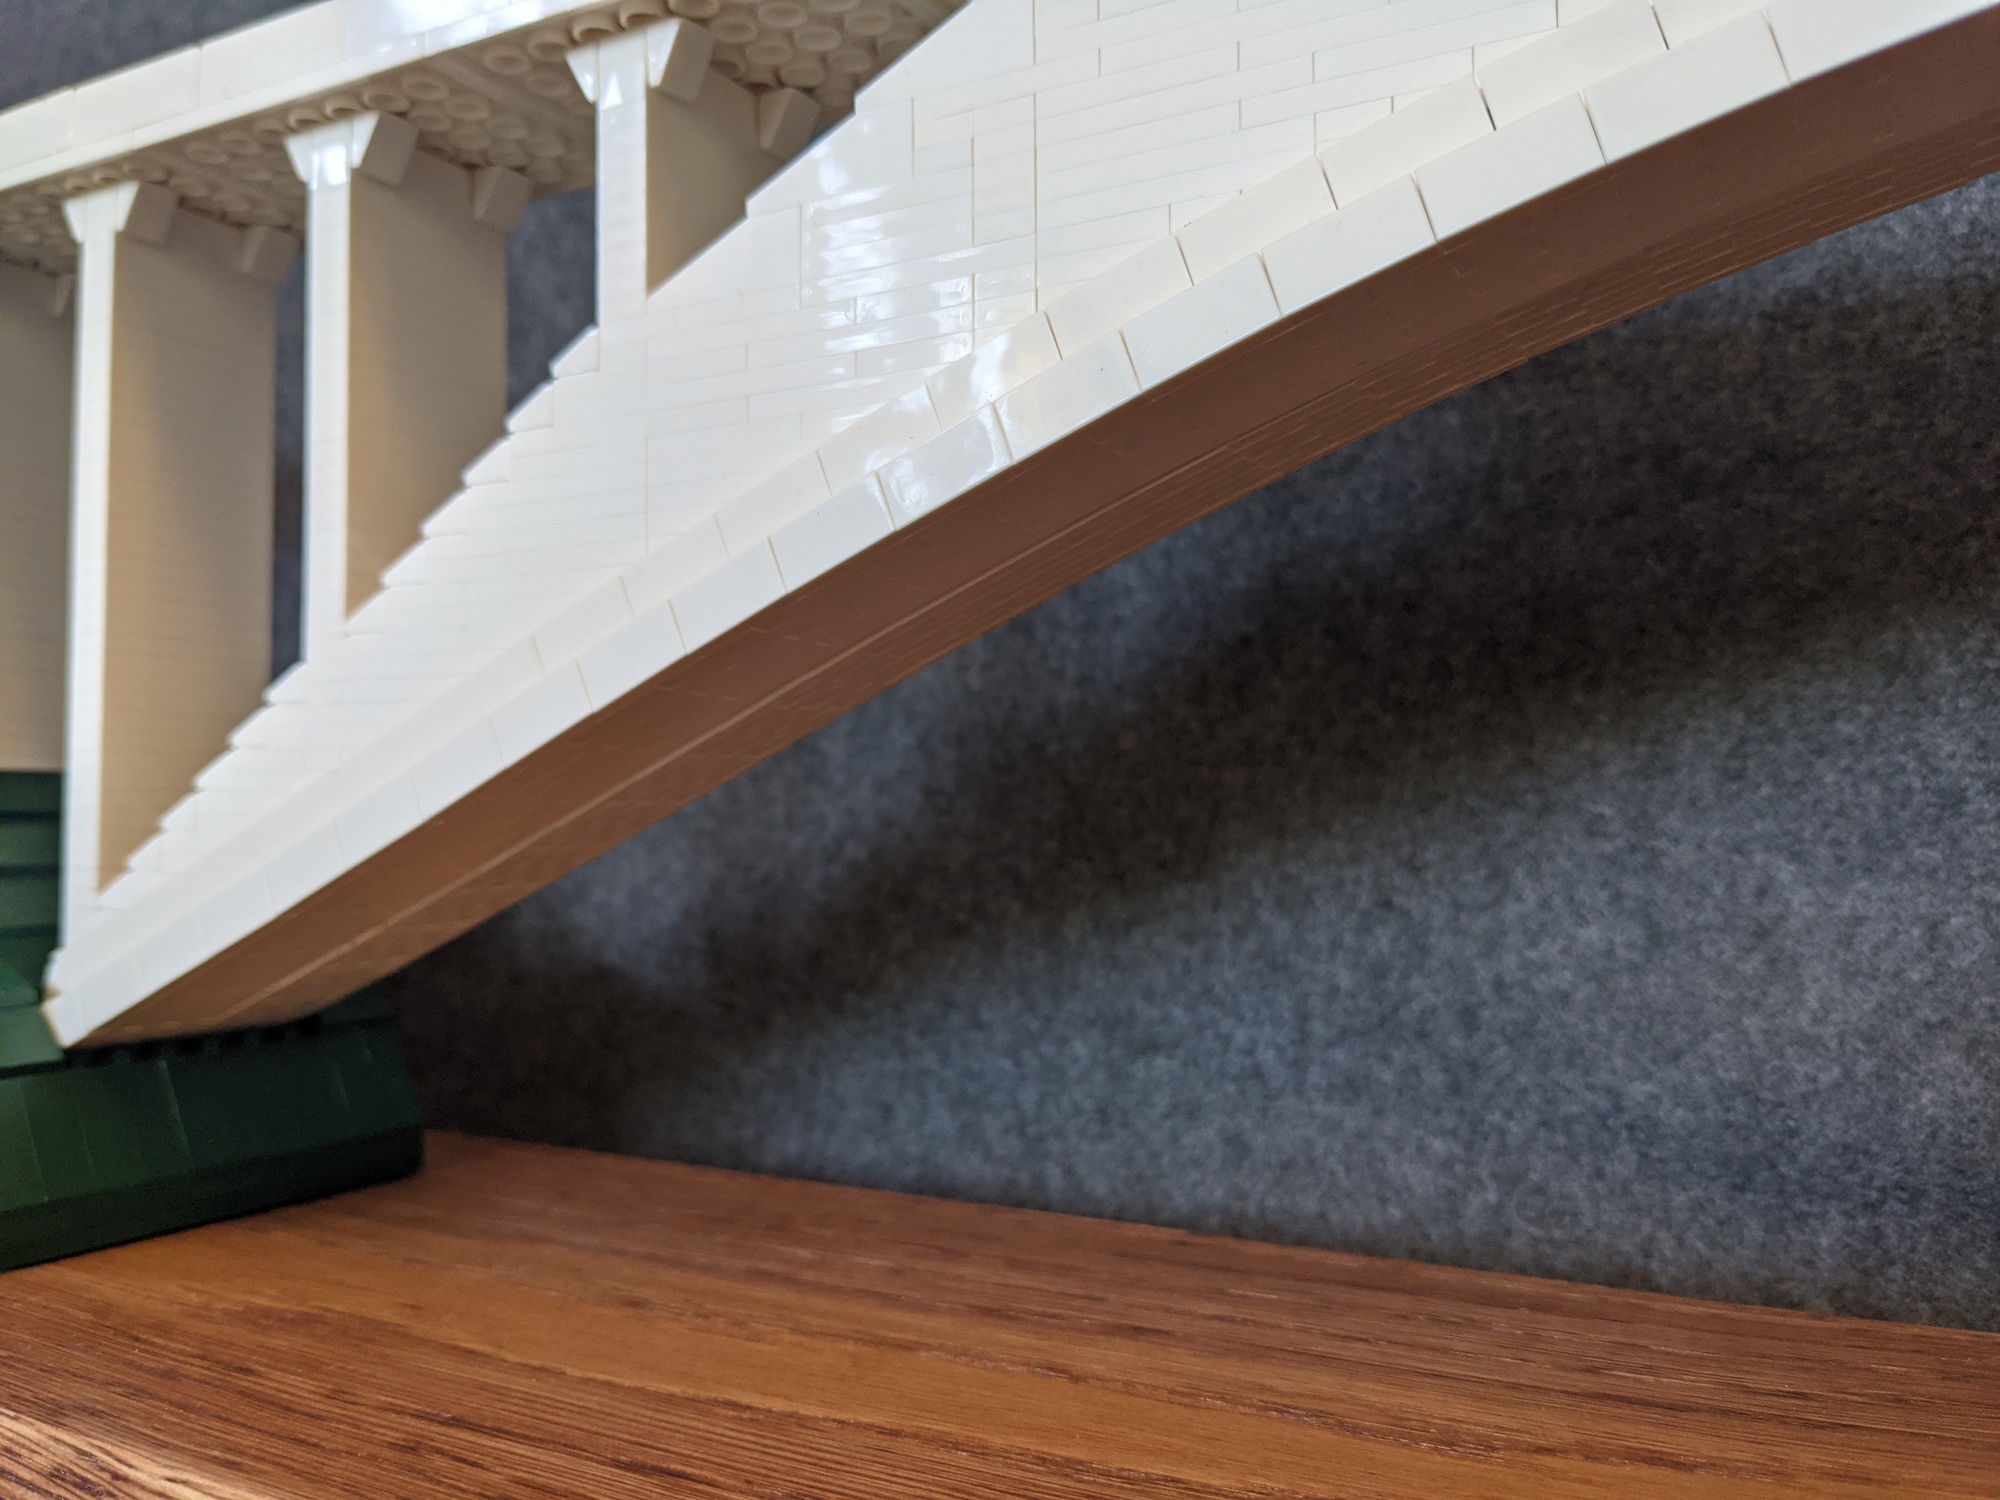
The sides of the box girder are built using the standard rectilinear LEGO technique, which means the bottom edge has a step function shape and does not match up with the smooth curve of the arch. To hide this, there’s an extra layer of wider plates (part 33909 for the deeply curious) attached to the outside edge of the arch. No piece in the arch could be more than 2 studs long in order to avoid reducing the “turning radius”.
I was pretty sure the curved nature of this model didn’t lend itself to modelling in Studio, so I built some small prototypes.
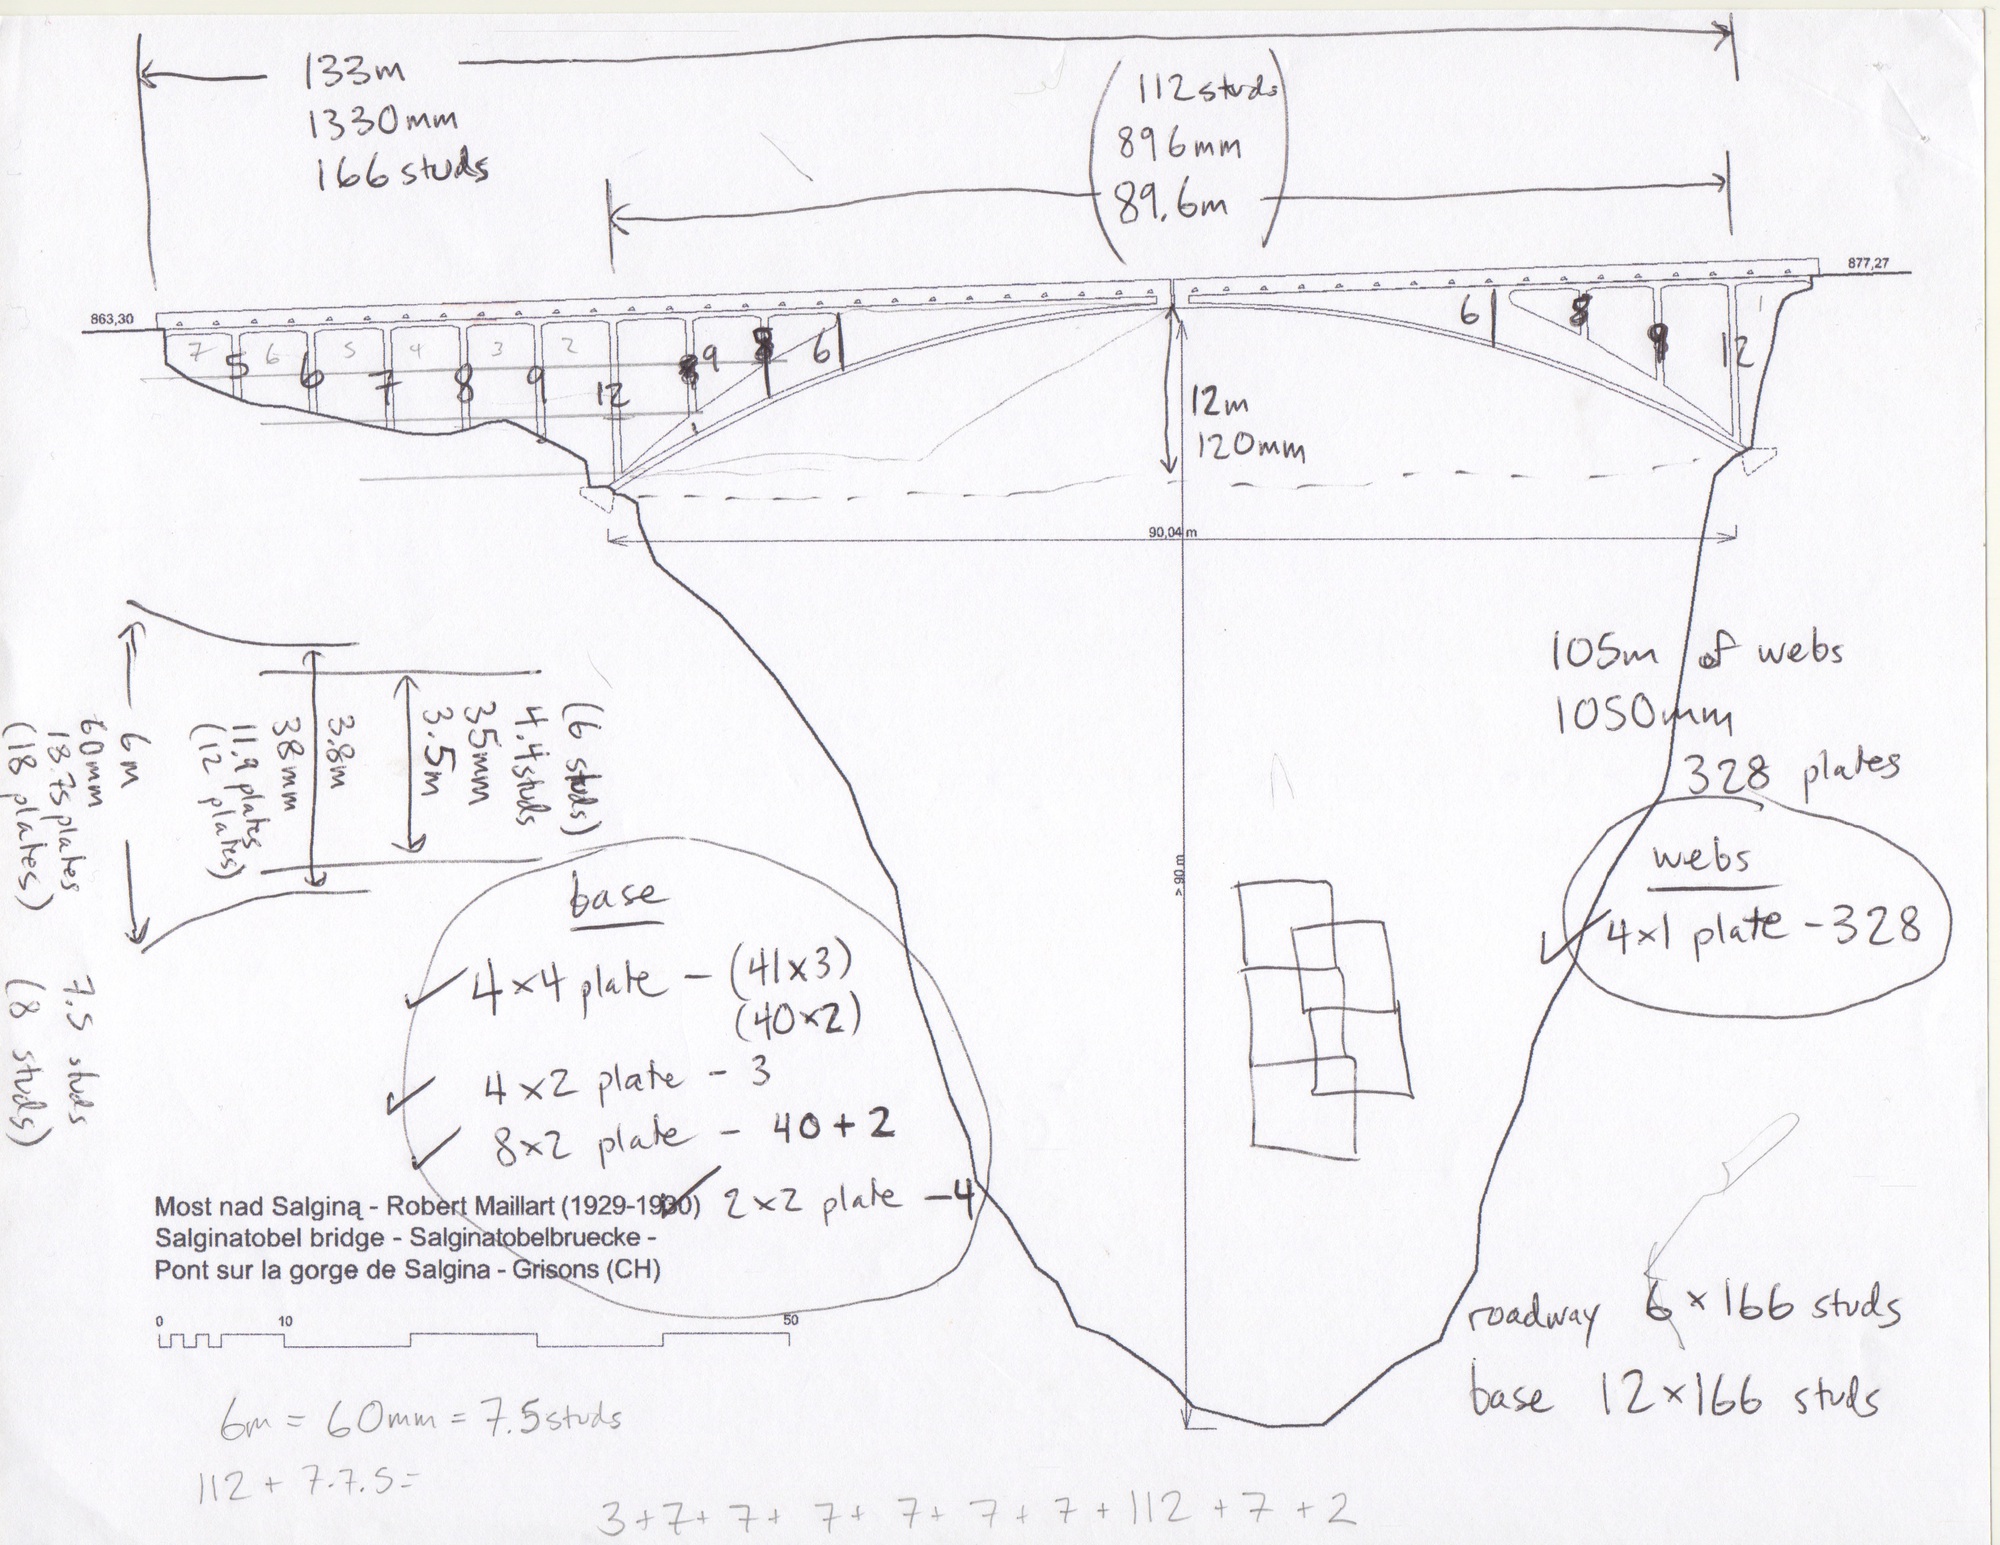
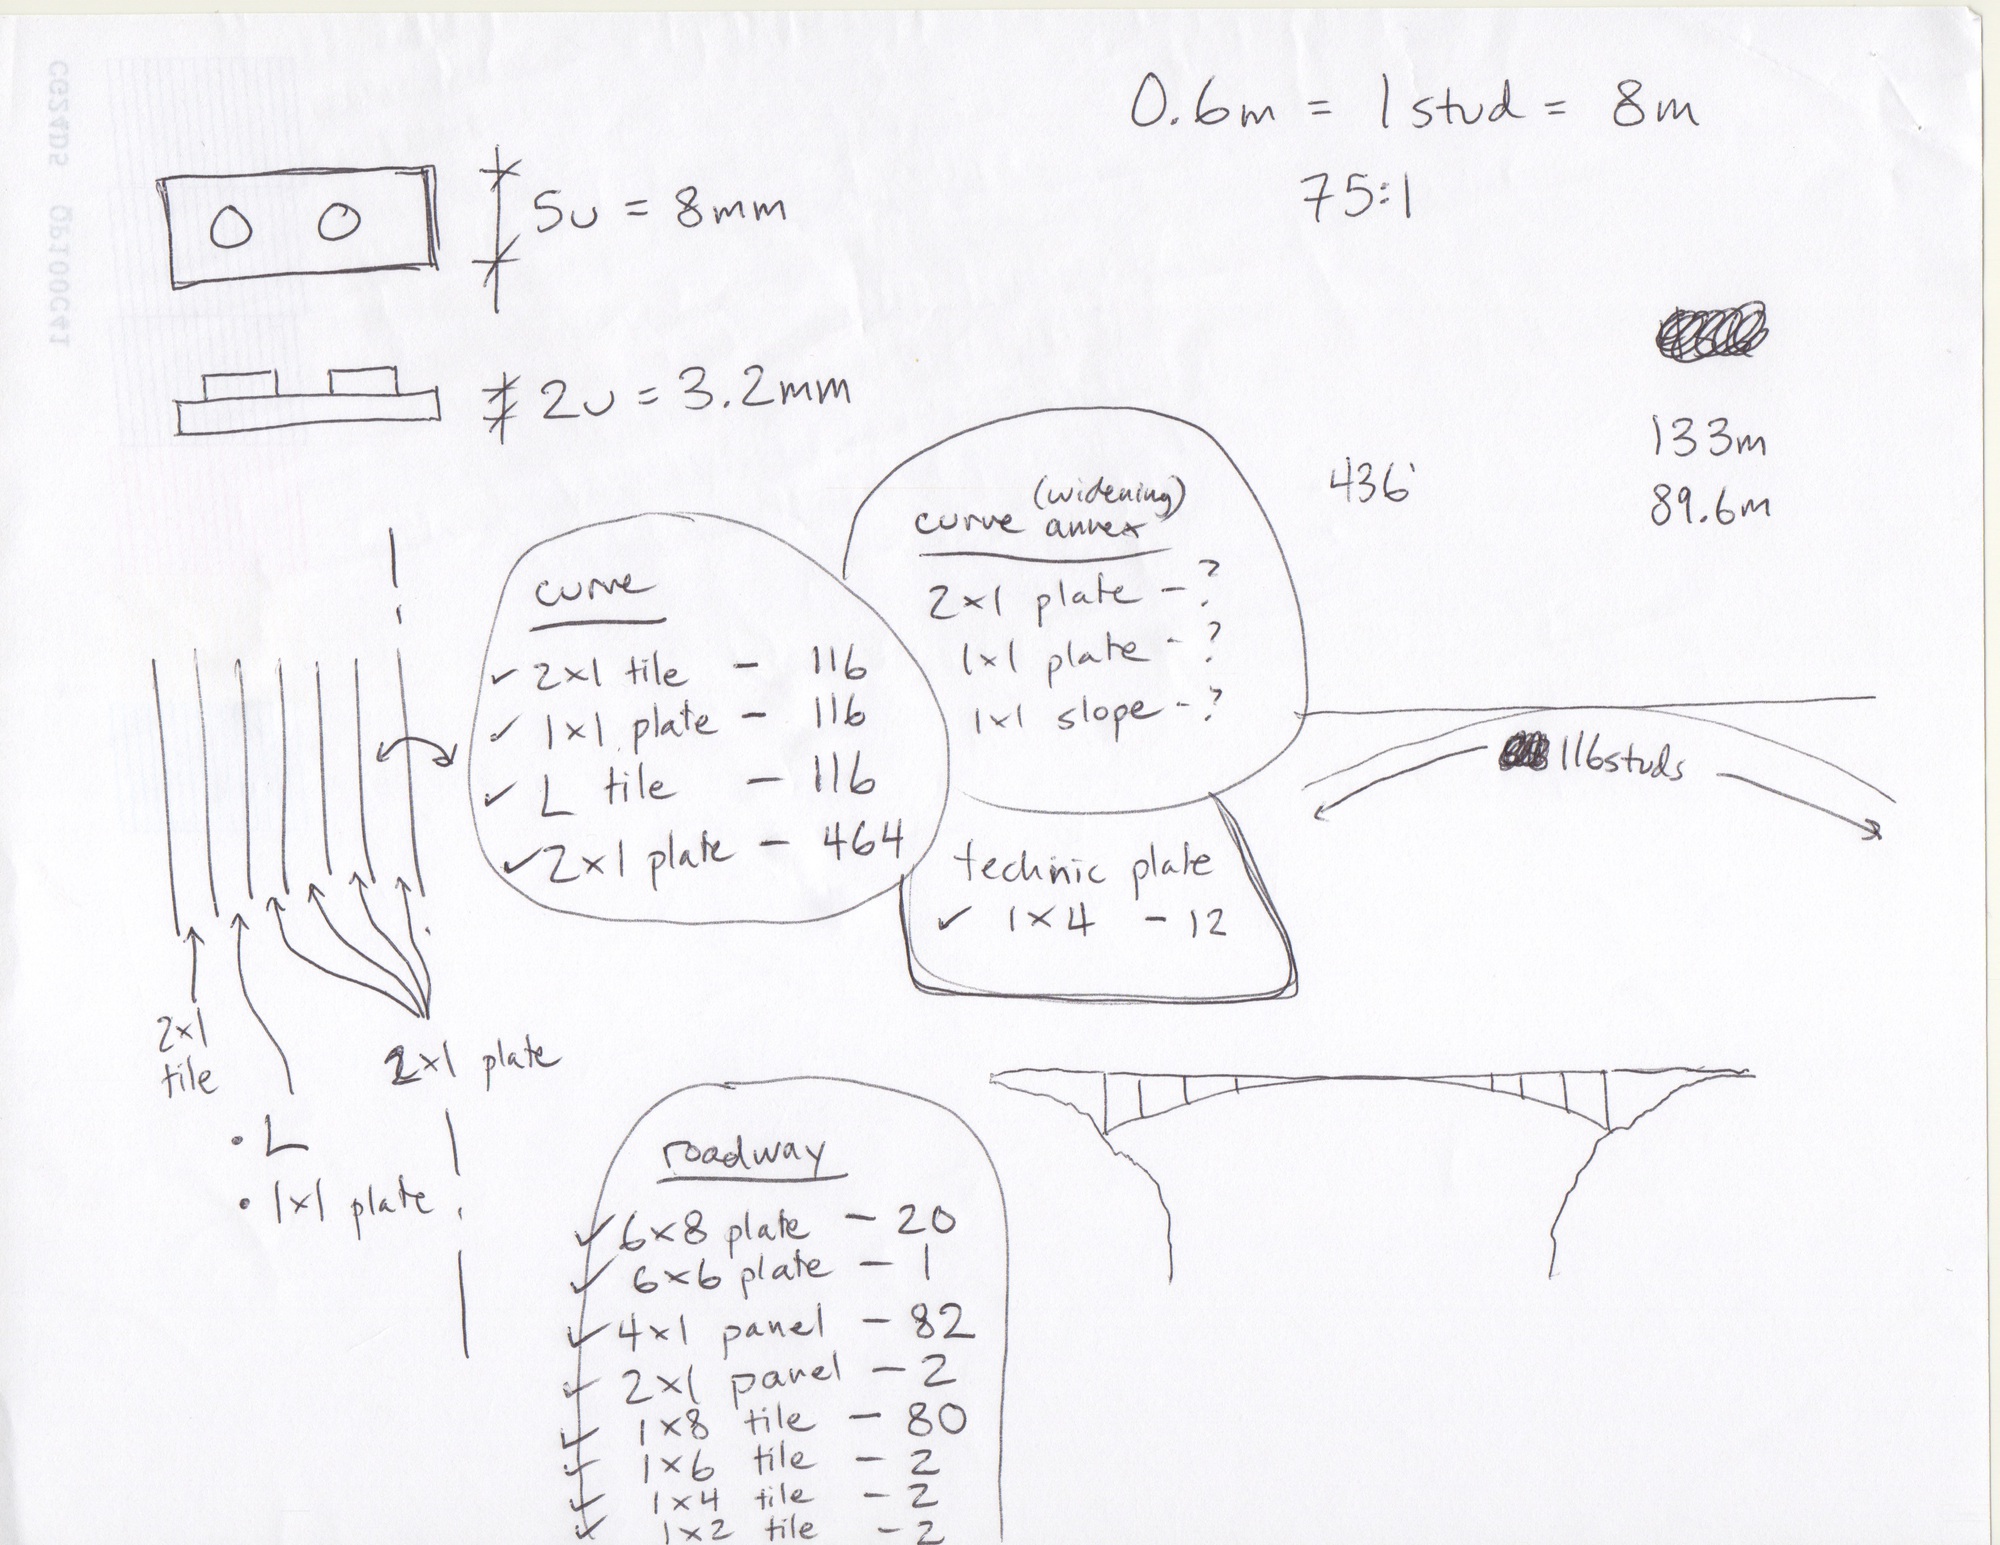
And calculated rough piece counts with paper and pencil.
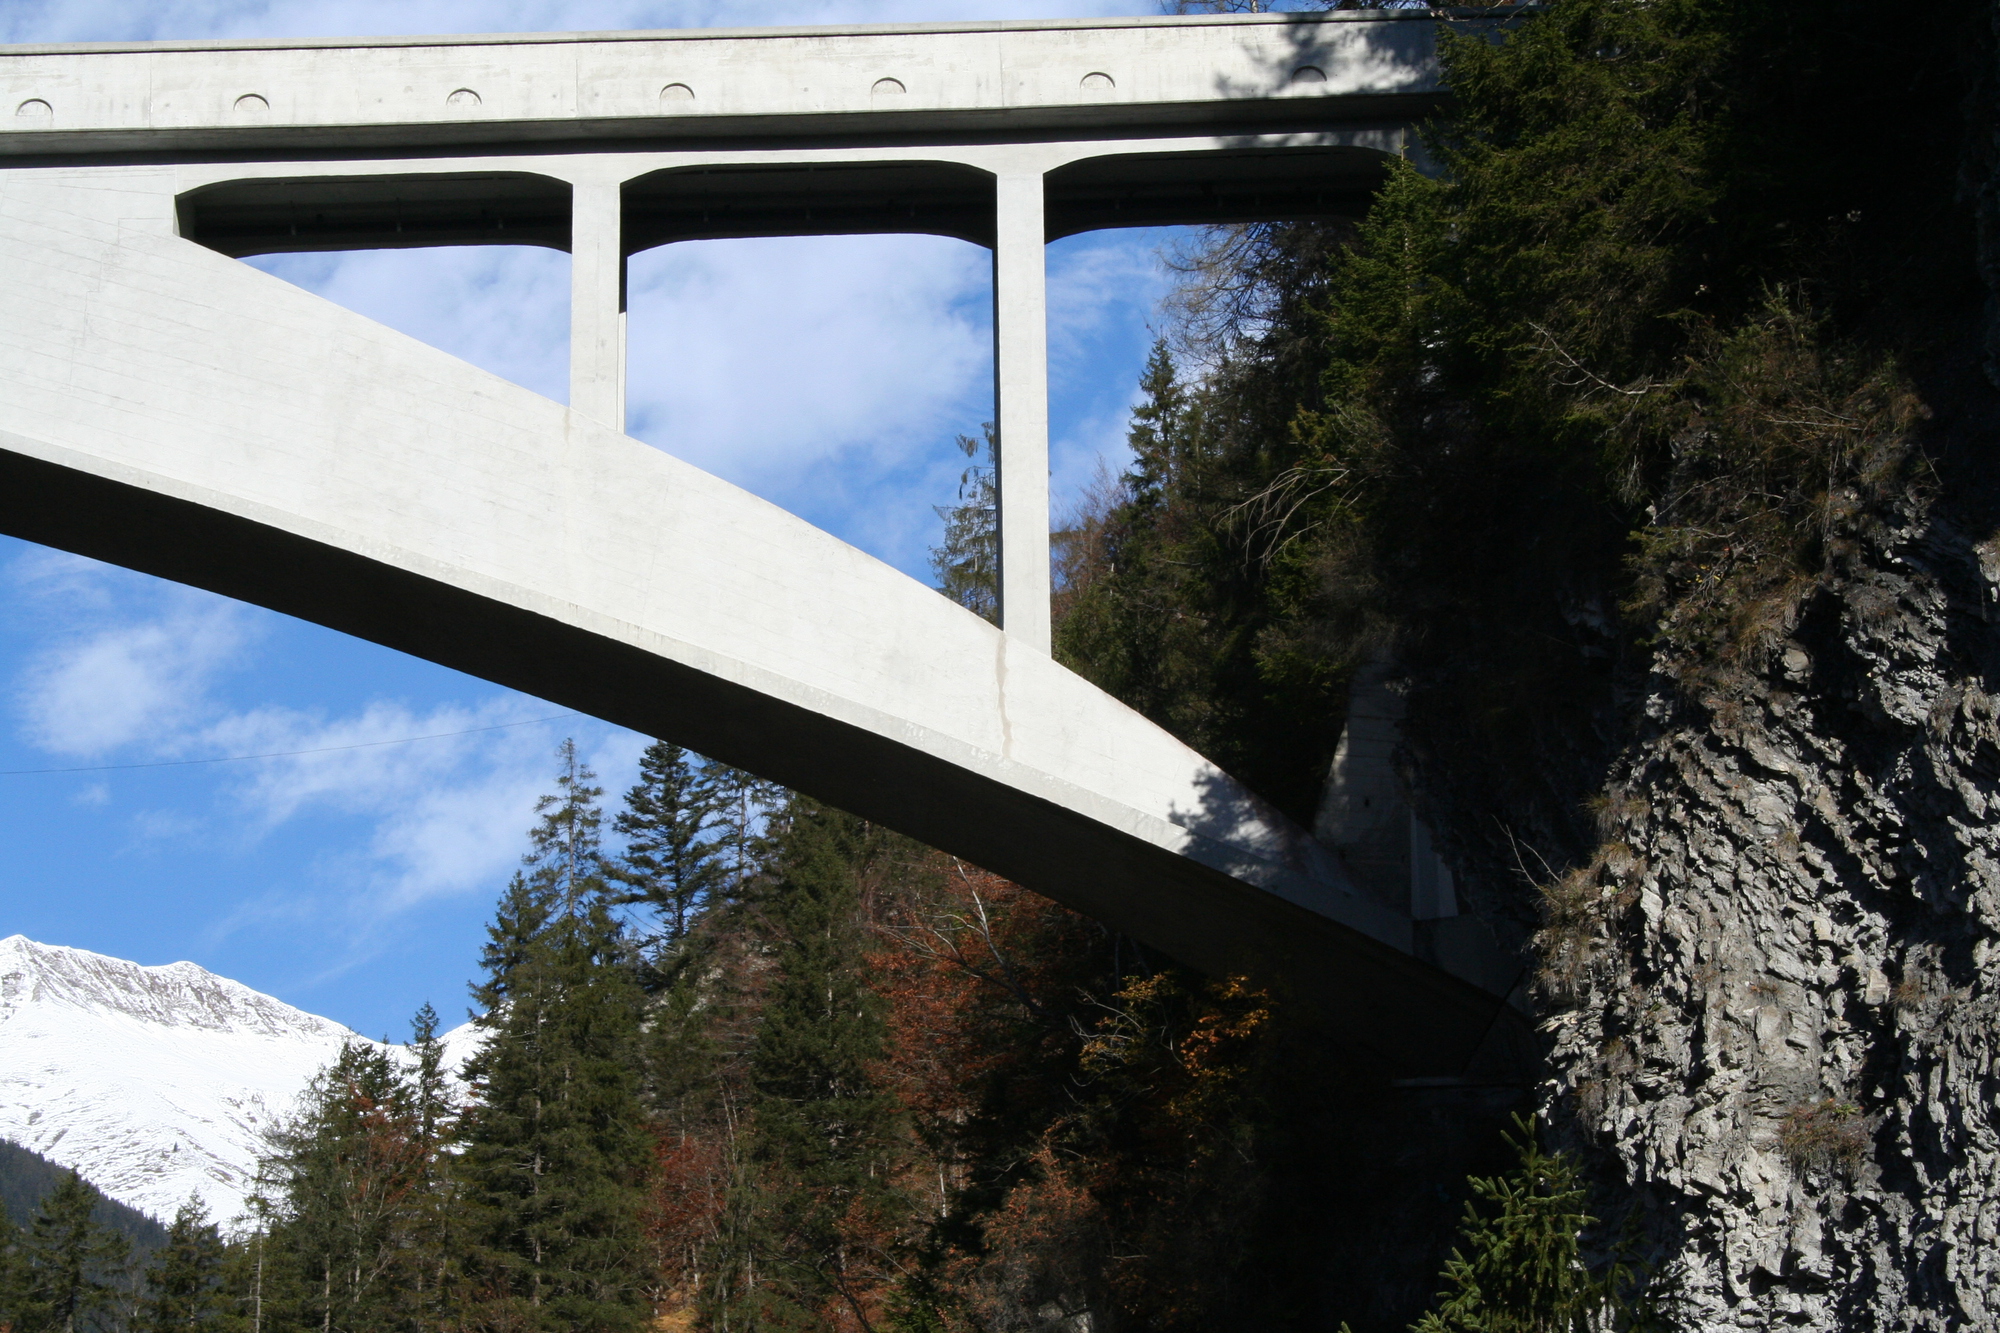
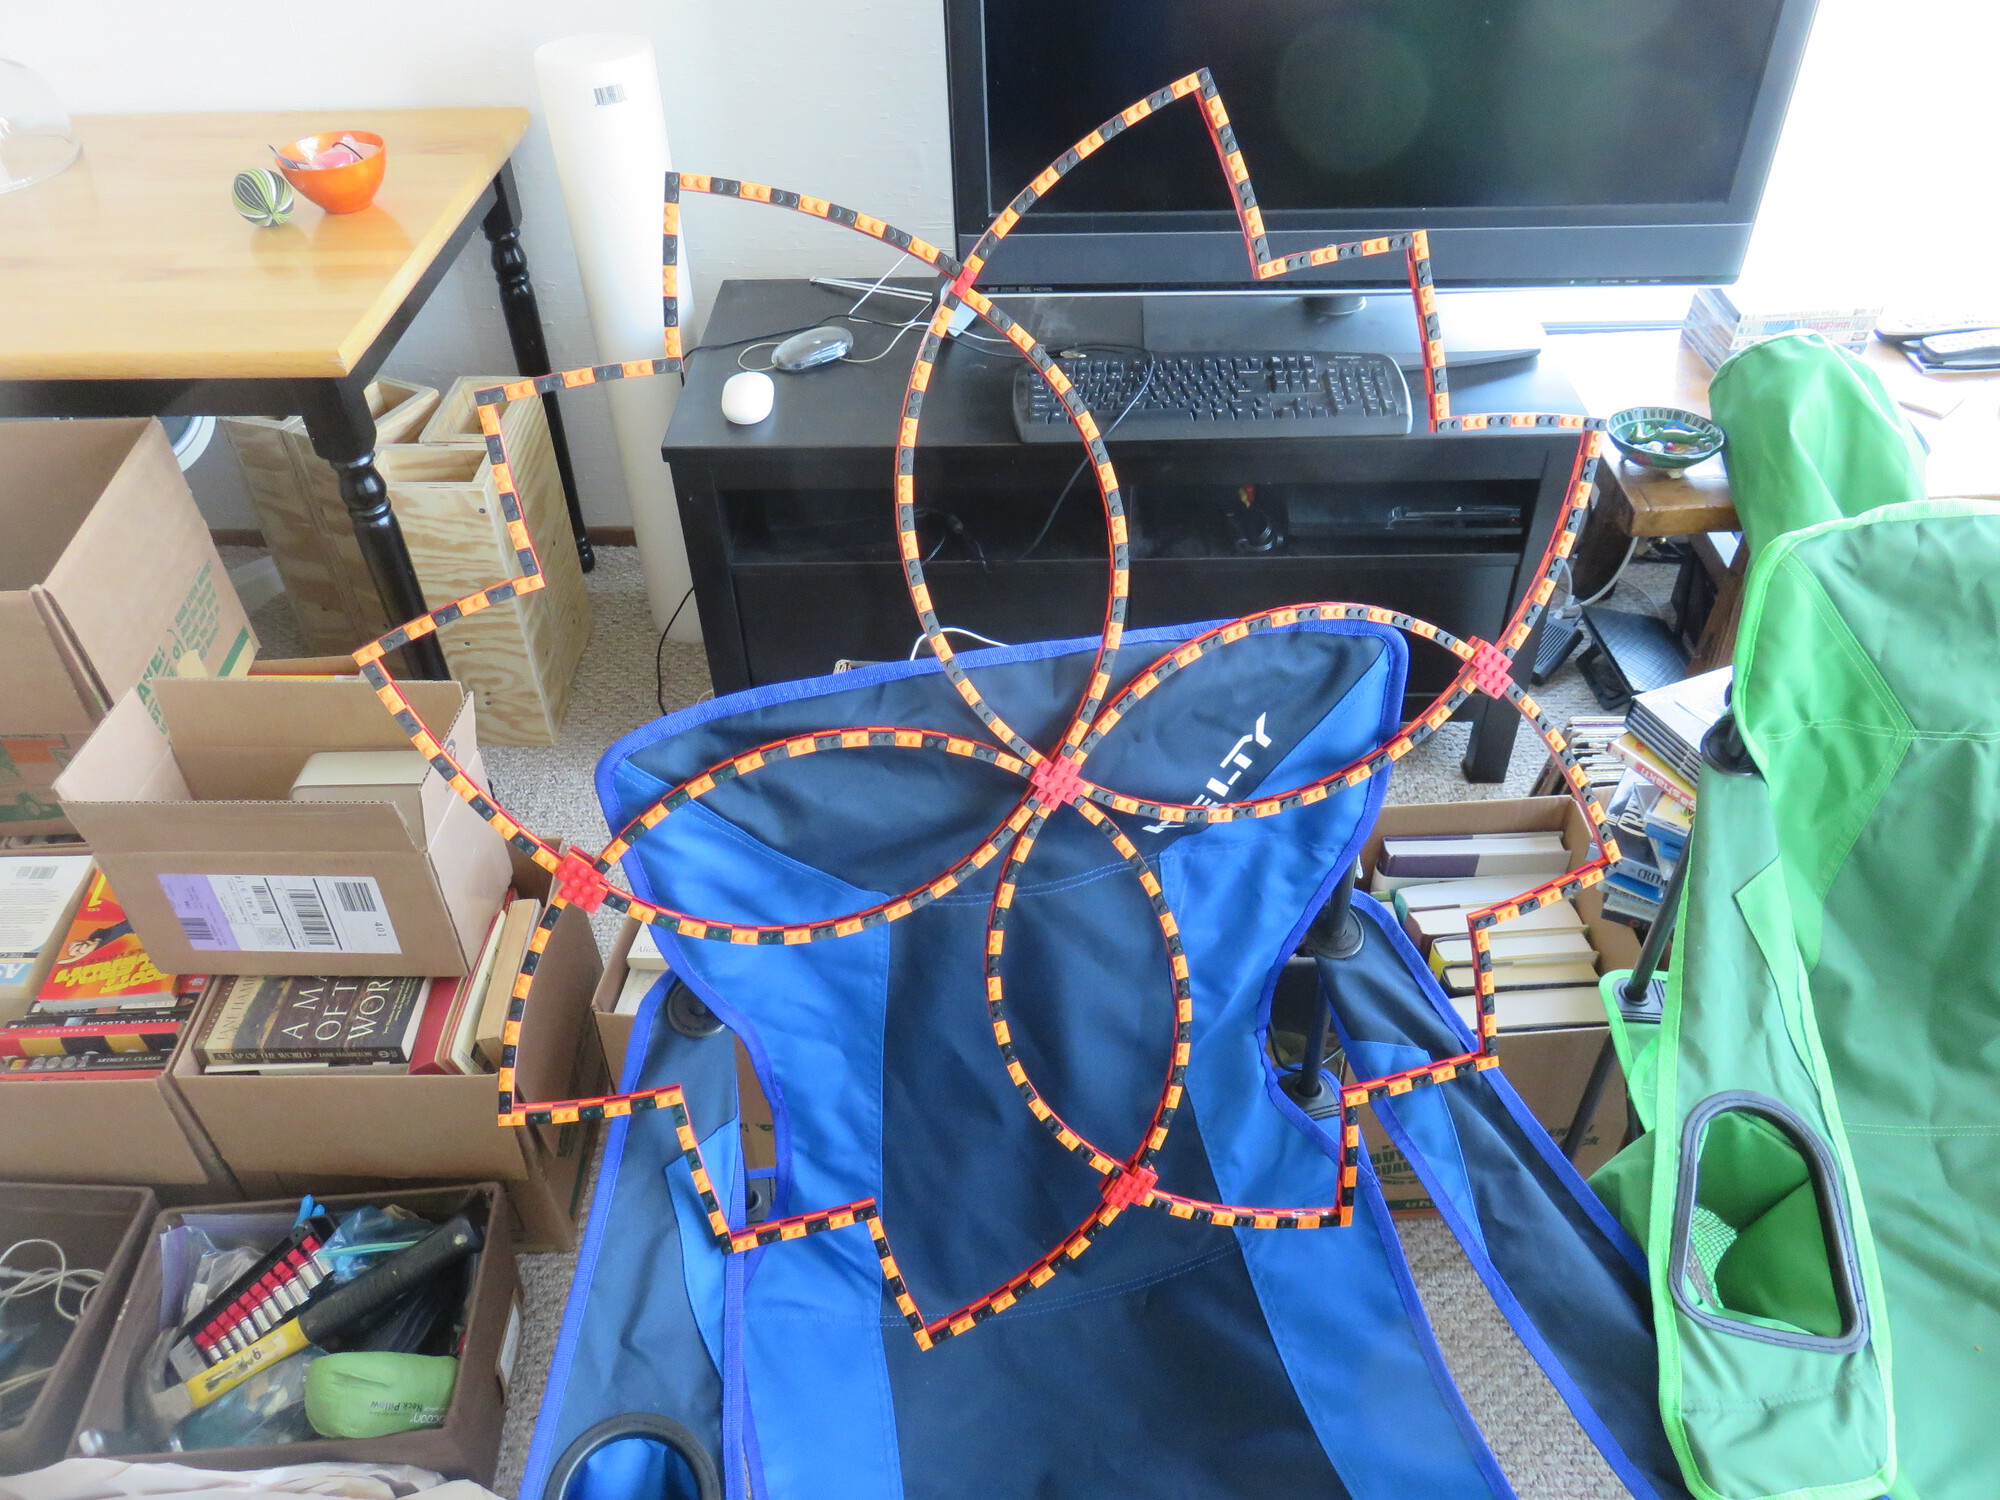
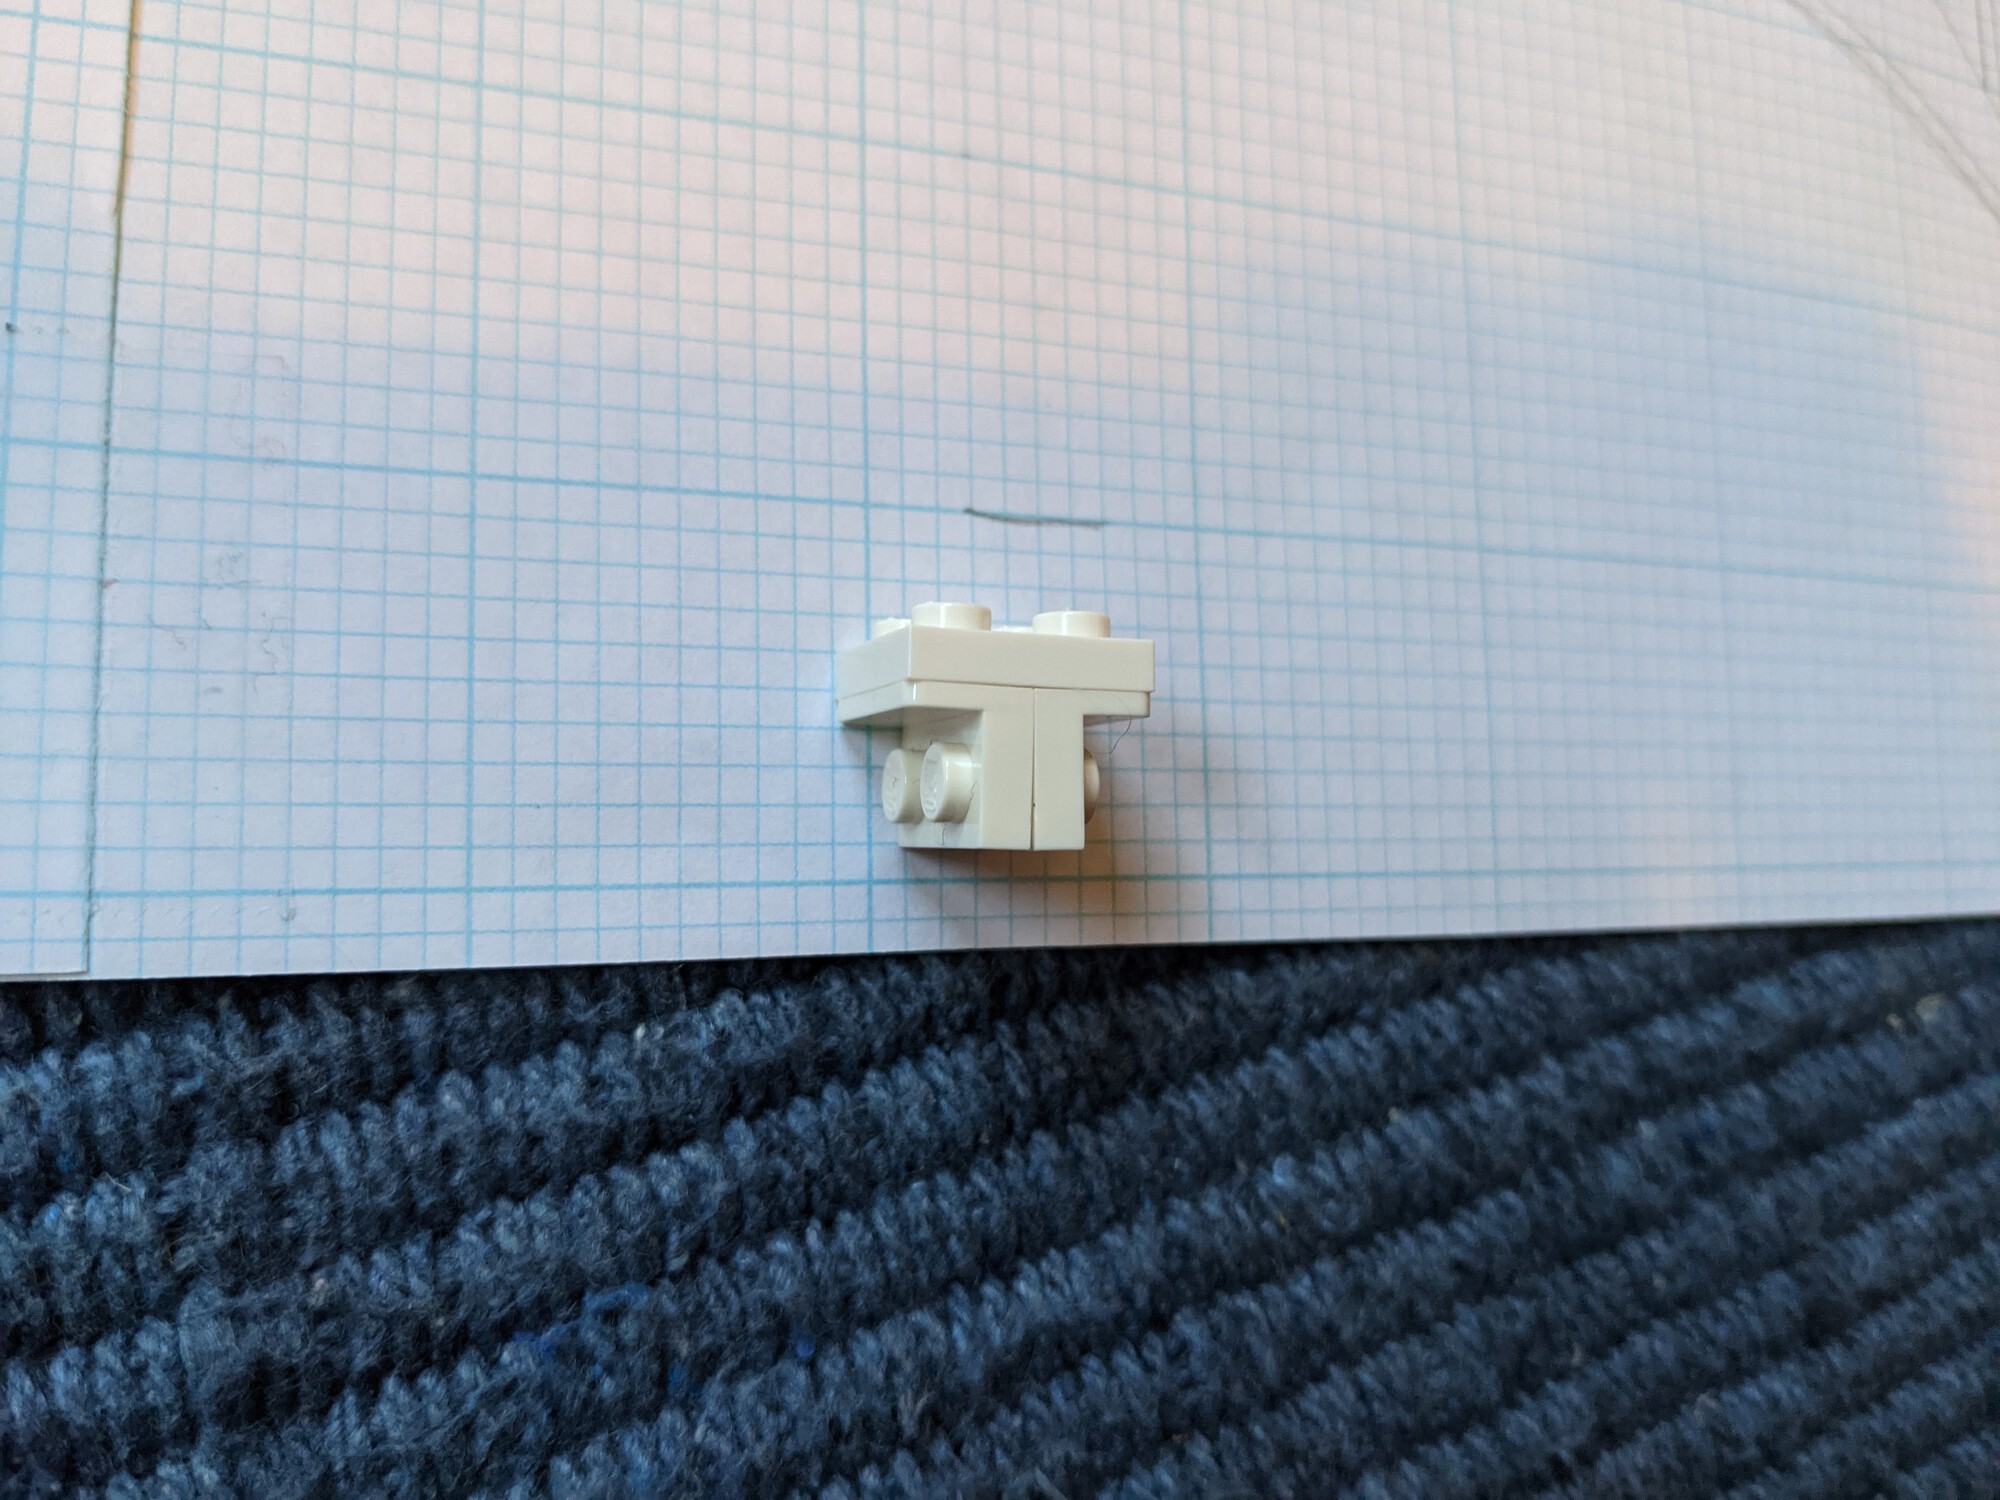
One interesting challenge was figuring out how to connect the two lengthwise halves of the arch together. I wanted the studs to face outwards on both sides so I could cover them with a layer of smooth tiles. One option was to build two fully-independent halves, but the arch is sufficiently flexible that I worried that would drift out of alignment with teach other. I eventually figured out that I could put two brackets back-to-back with a 2x2 plate on top to attach the two anti-stud sides together. There are three of these connection points along the length of the bridge.
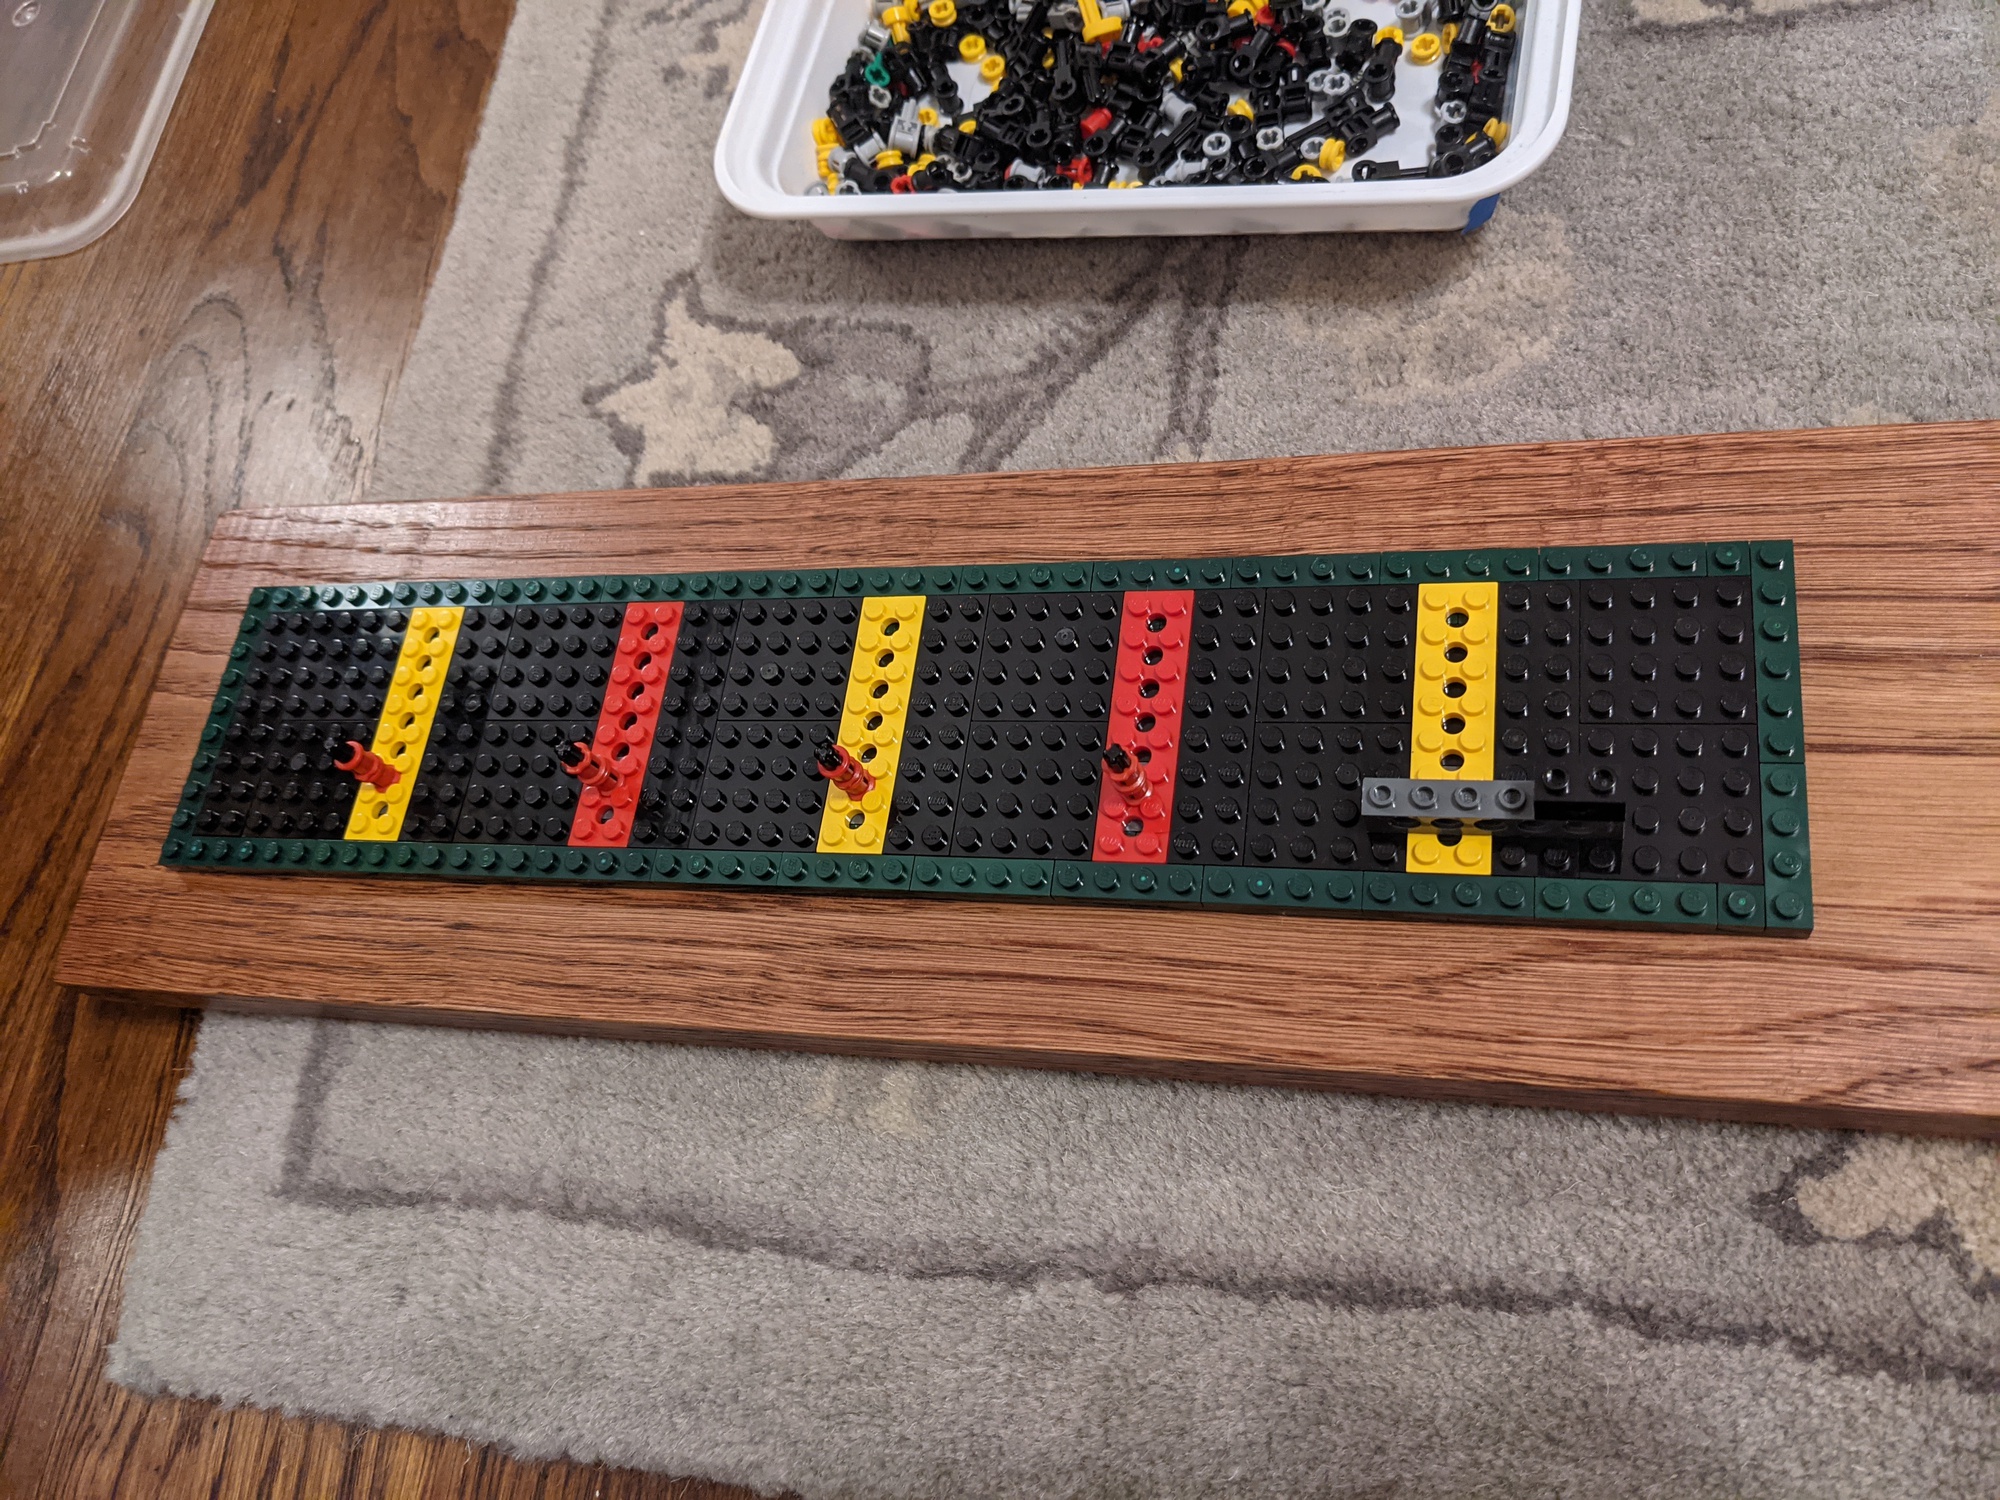
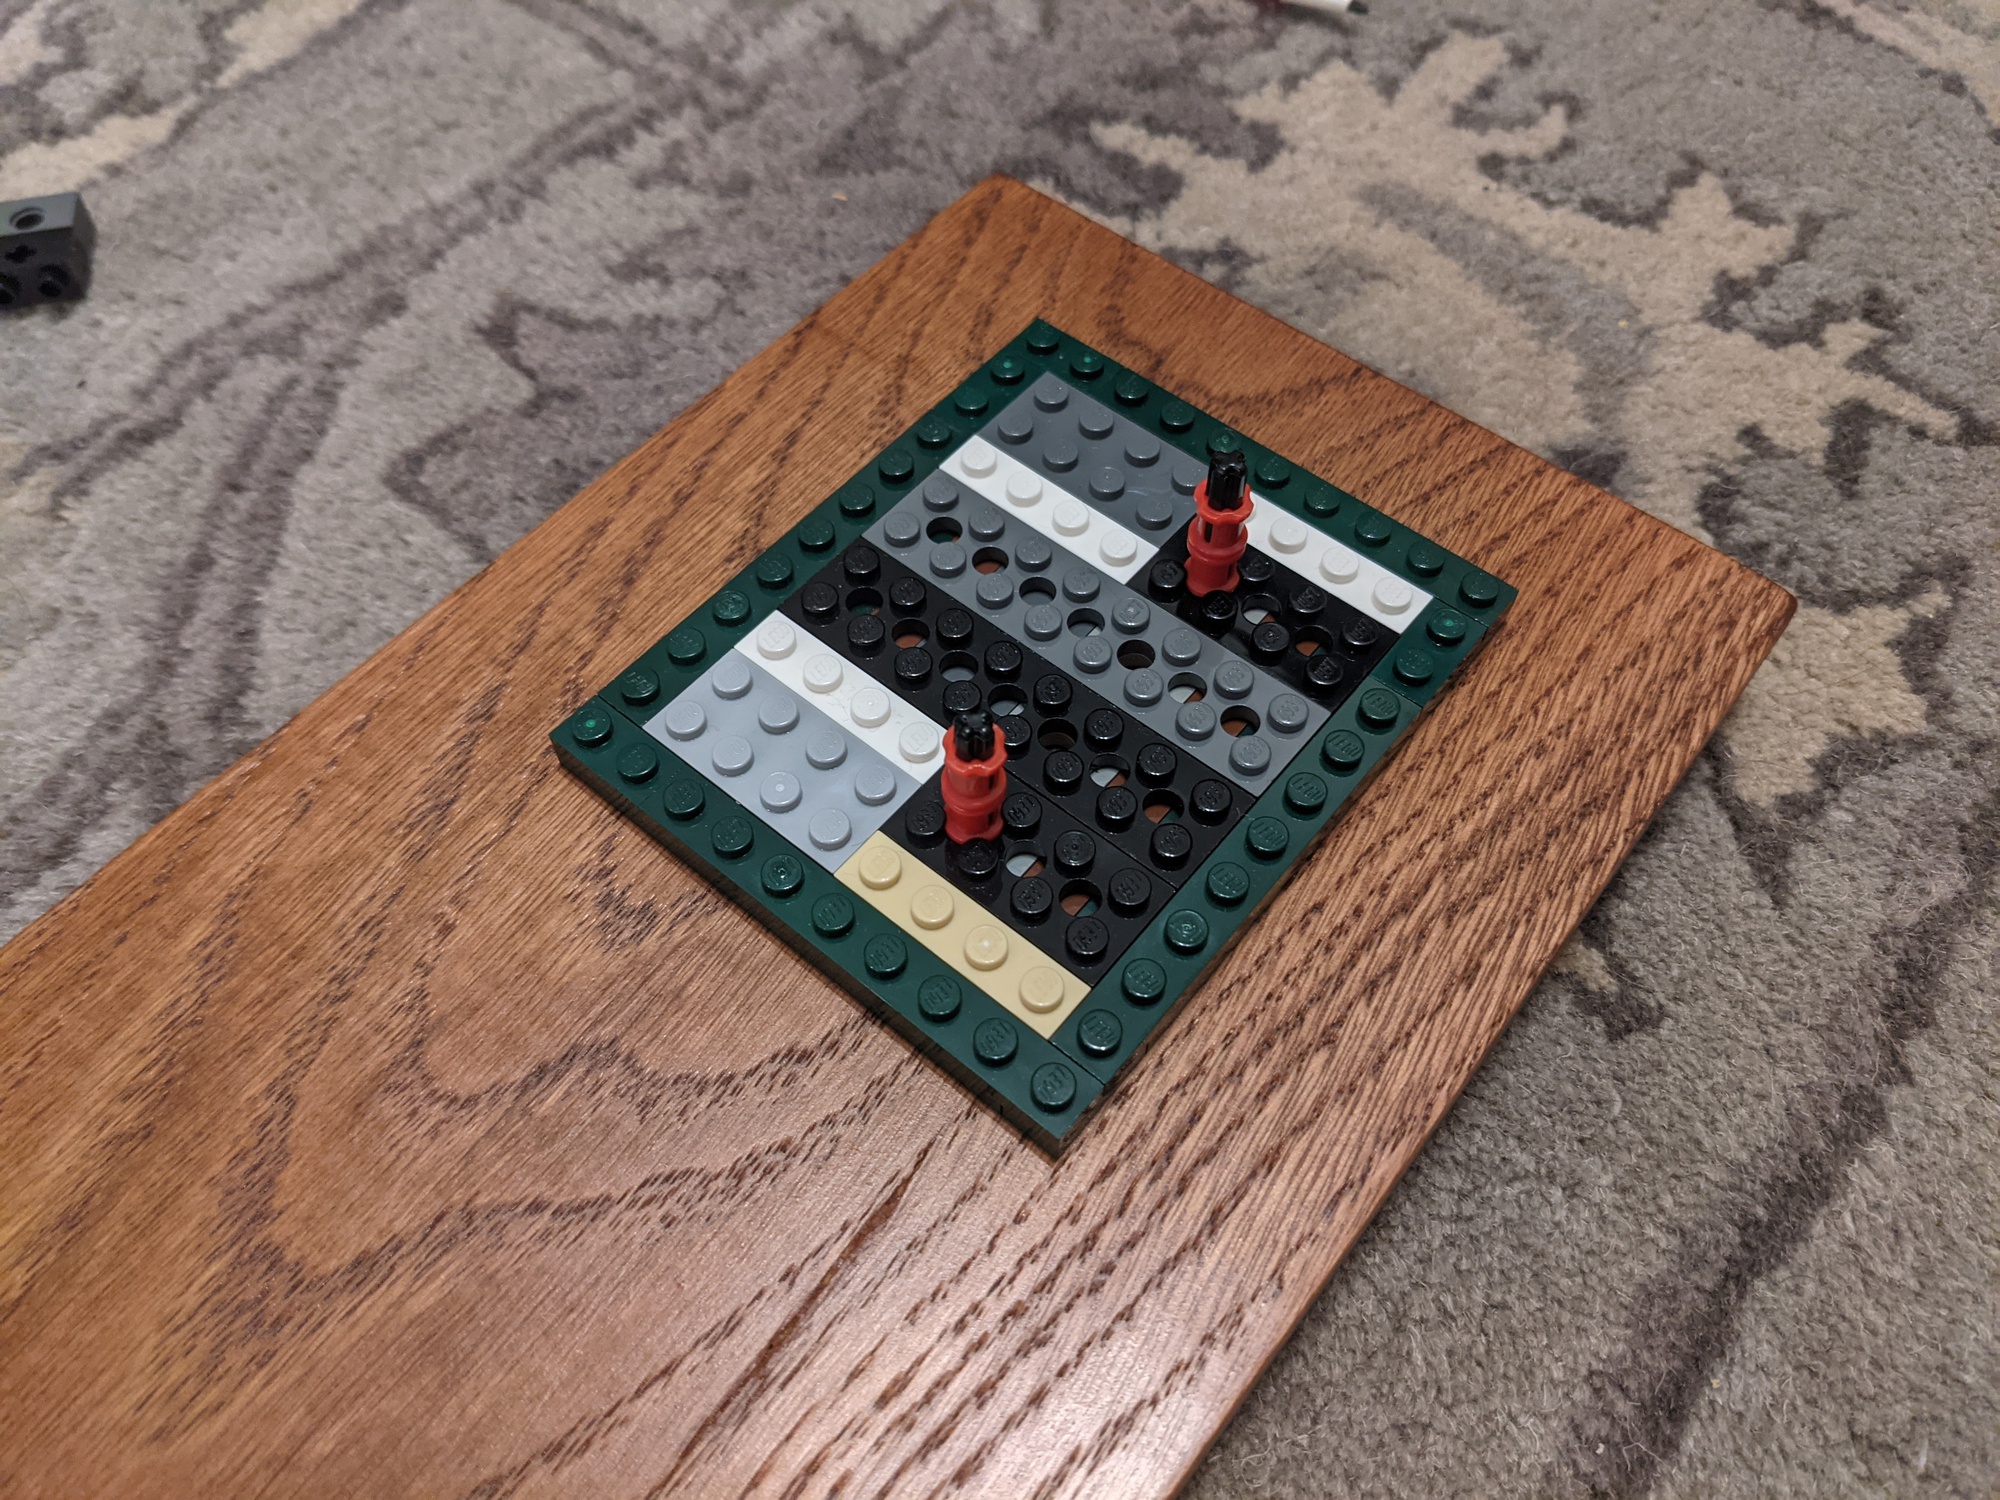
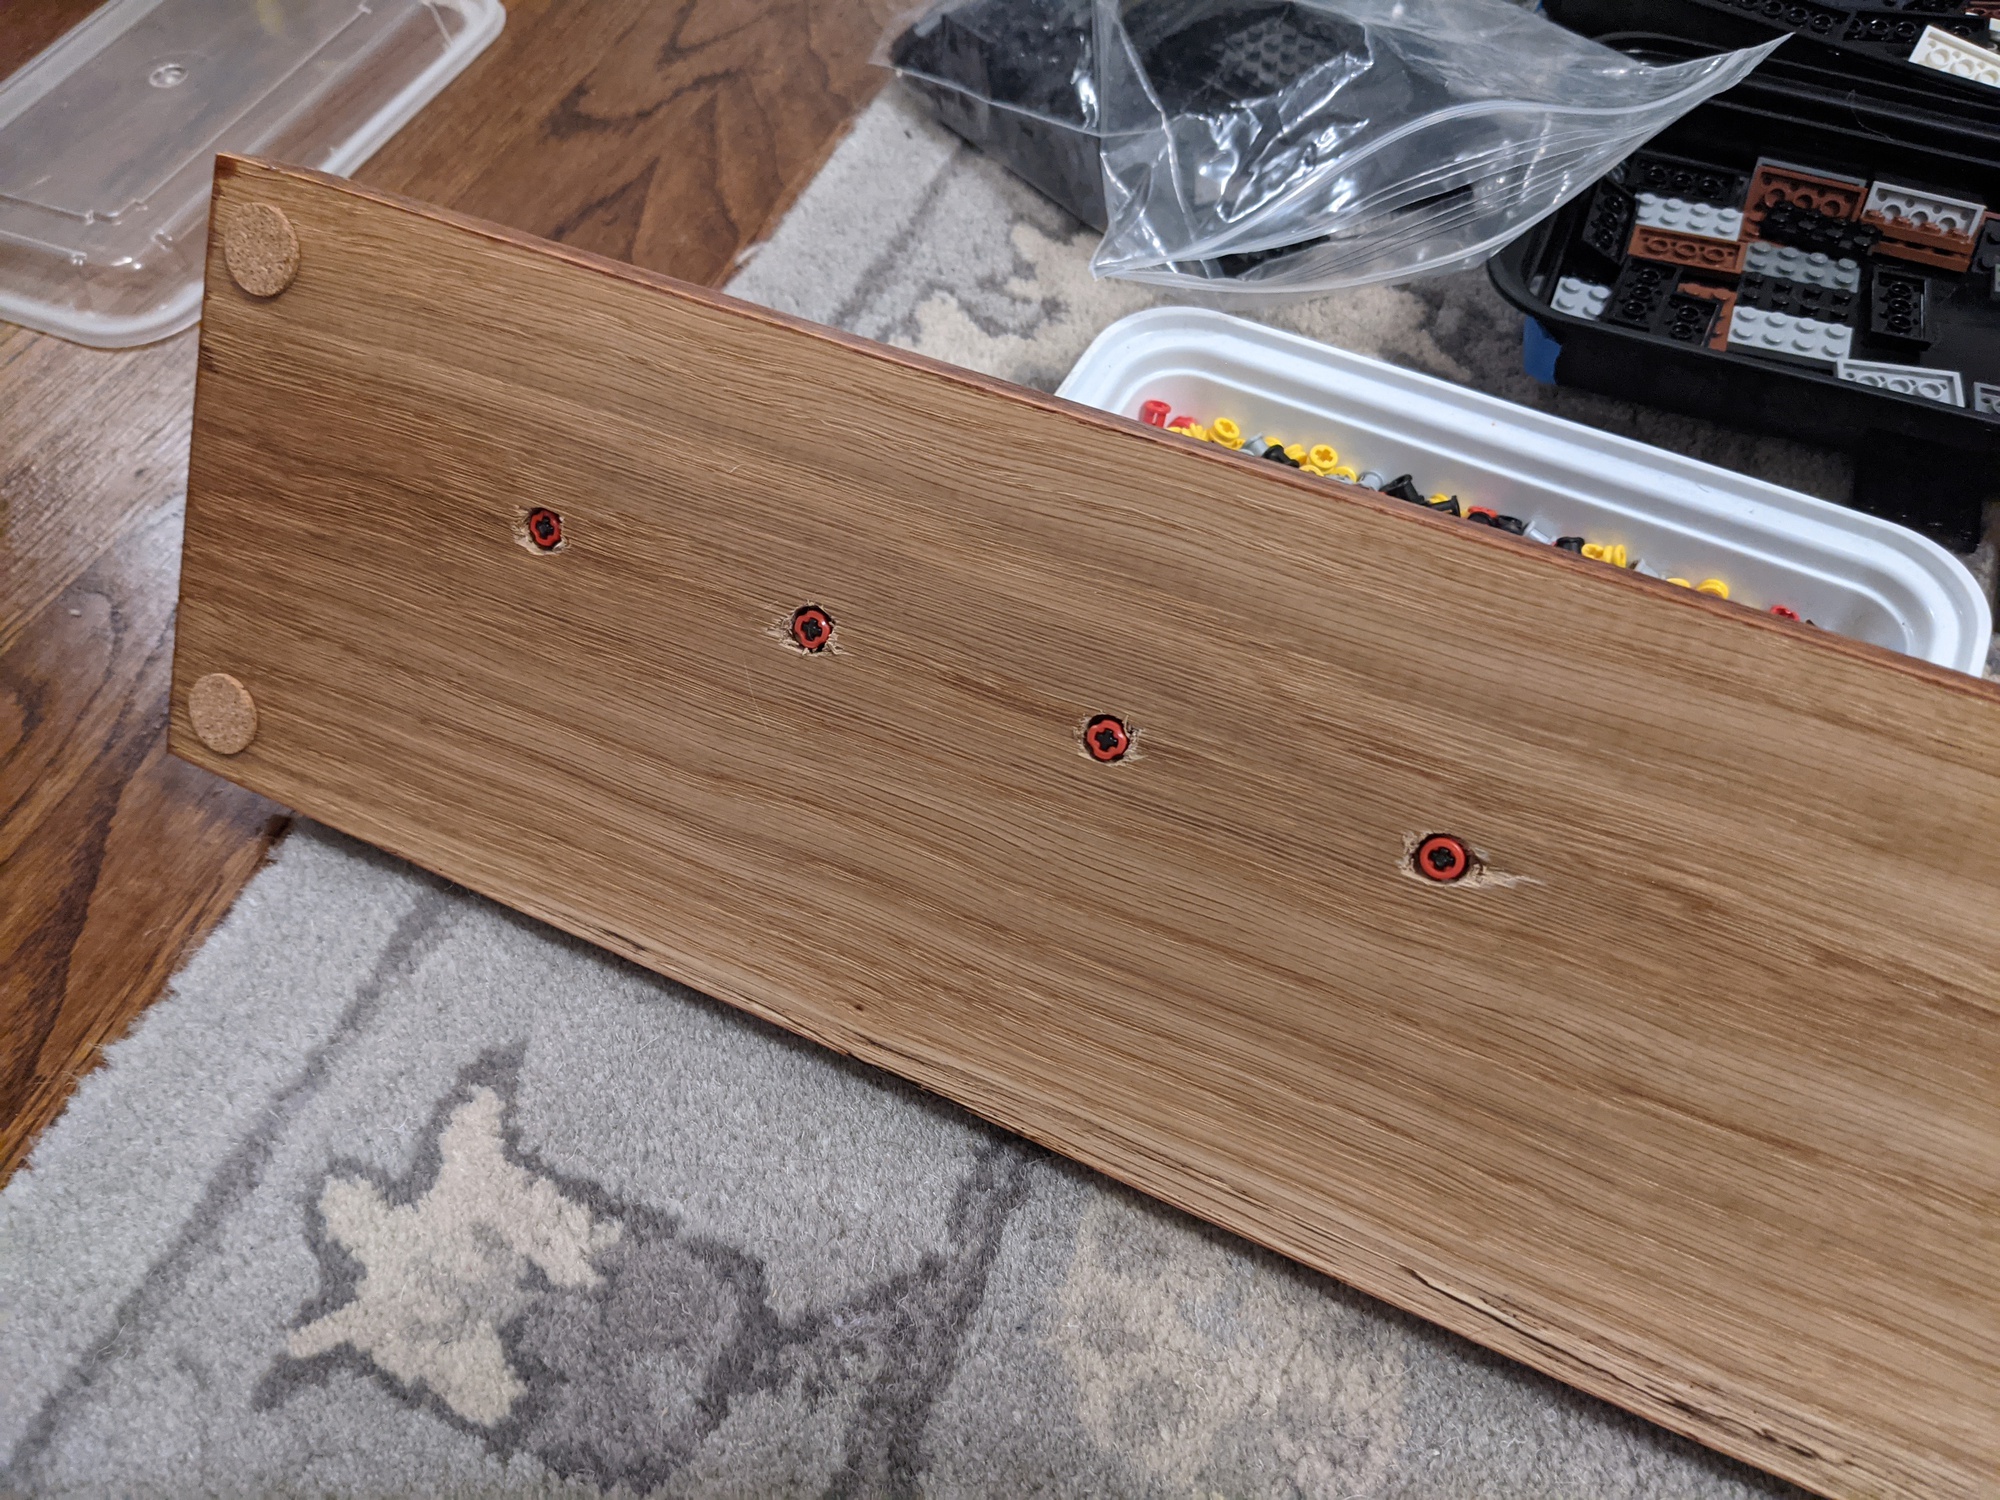
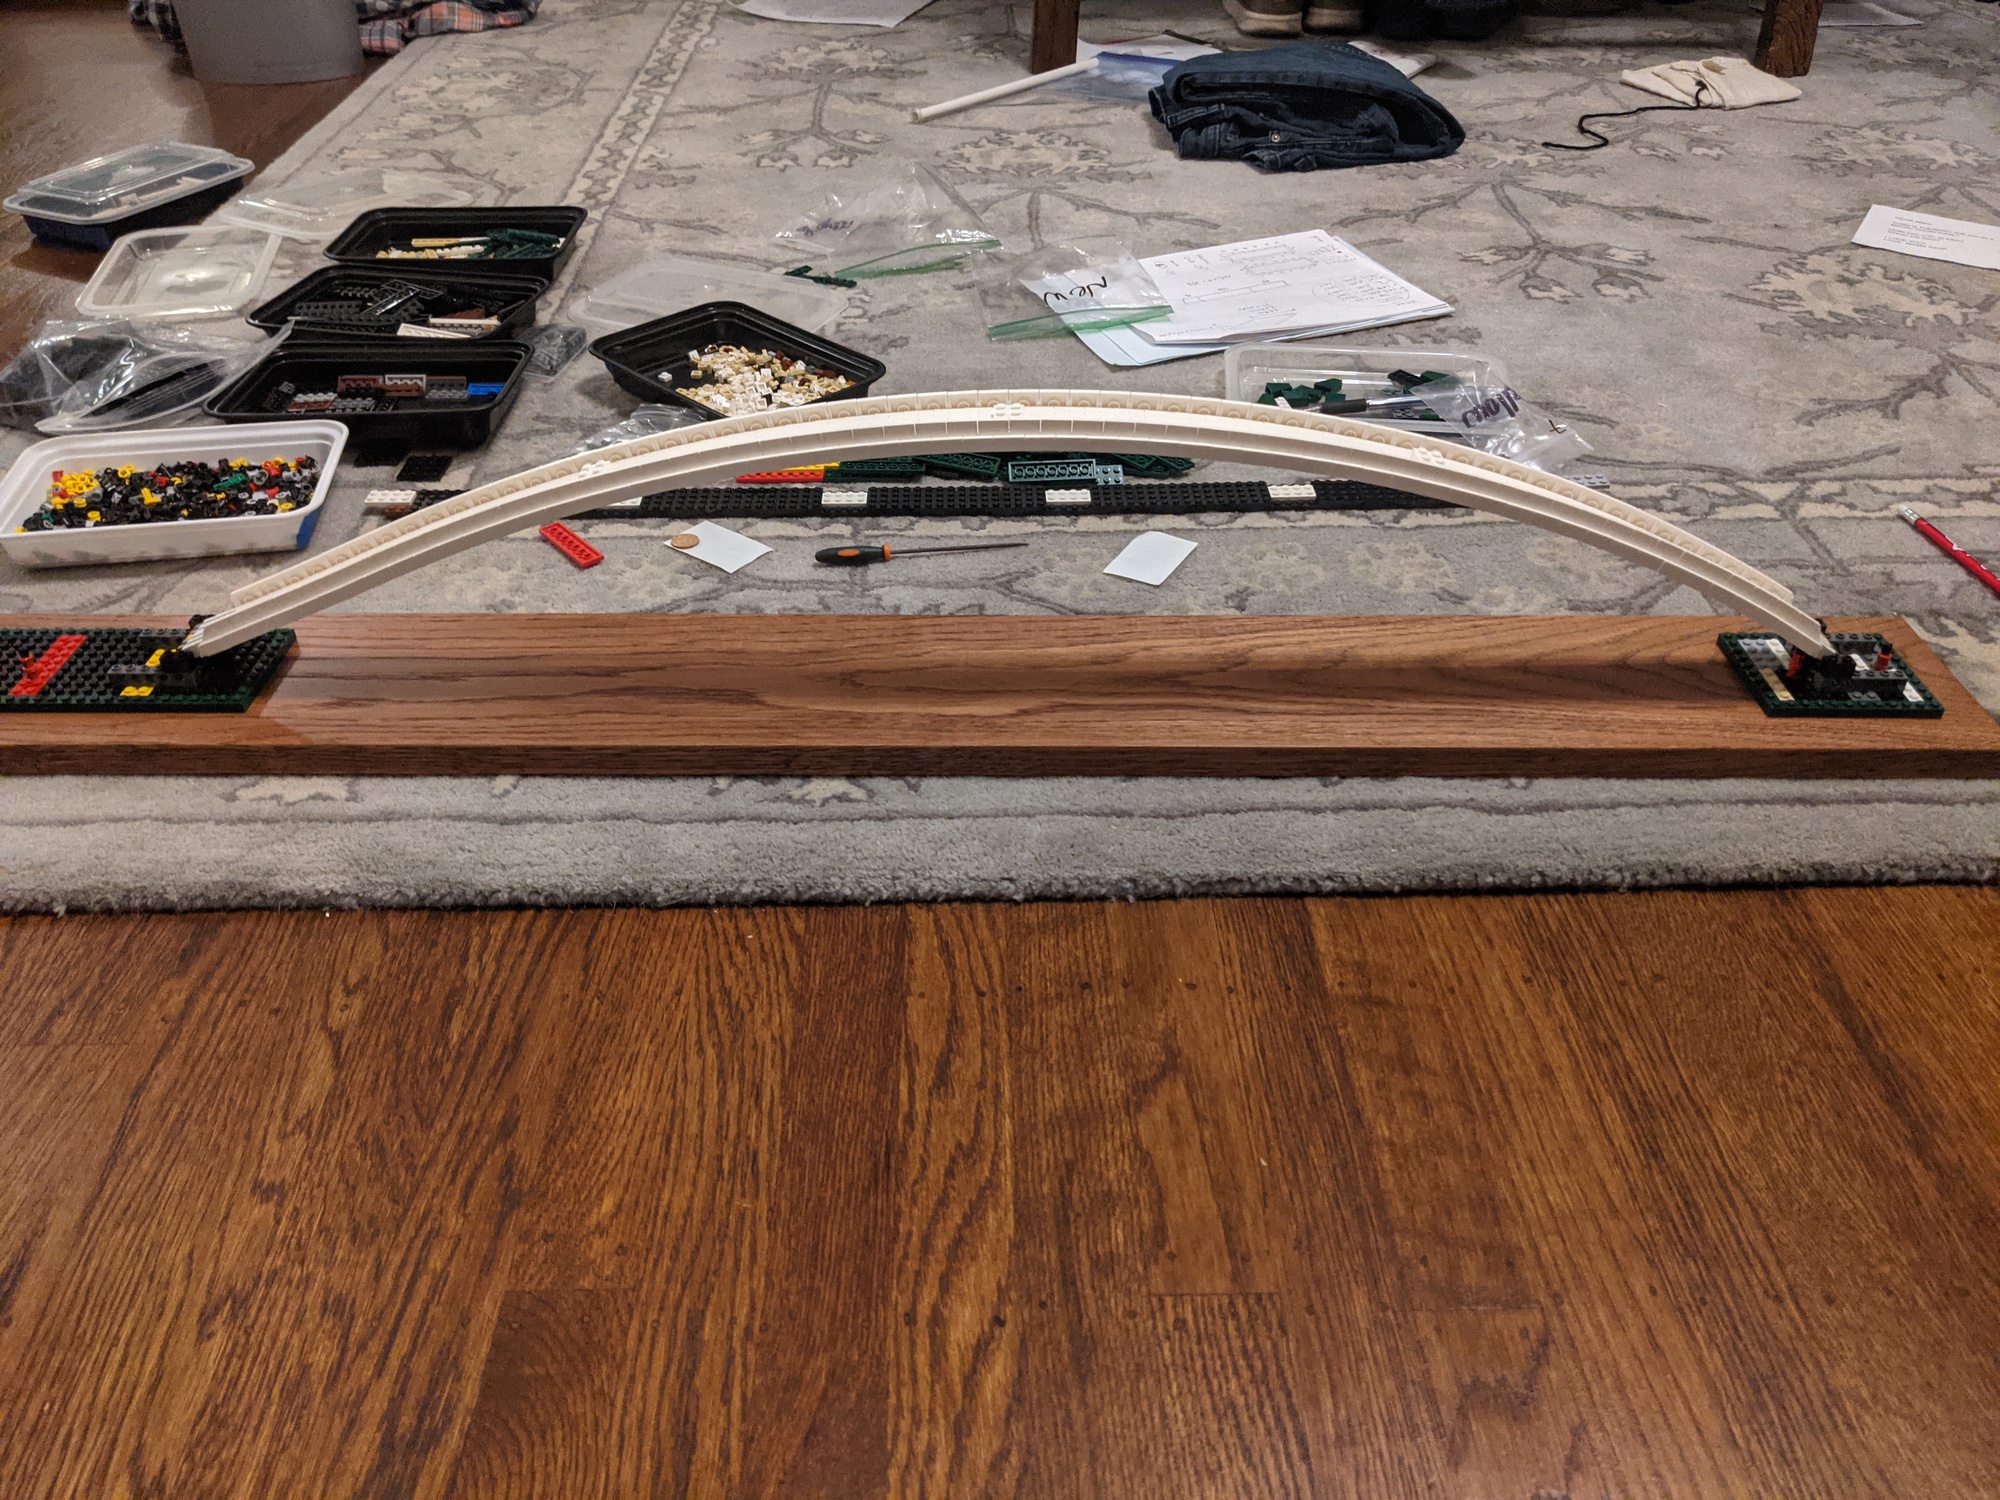
During most of the construction process, I had the model on top of a large black baseboard that was cobbled together from medium-side plates. I ultimately expected to place the whole assembly onto a piece of wood for display purposes, but I later decided that the baseboard wasn’t necessary at all. I drilled a few holes in the wood board, and used Technic axles and bushes (plus some more Technic plates) to mount the bridge directly onto the board.
I opted for the hillsides to be somewhat abstract–solid dark green with curvature only along one plane–since the landscape is only really there mainly to provide a backdrop for the bridge itself. I haven’t completely mastered the use of slopes and curves, but I’m reasonably satisfied with how they look.
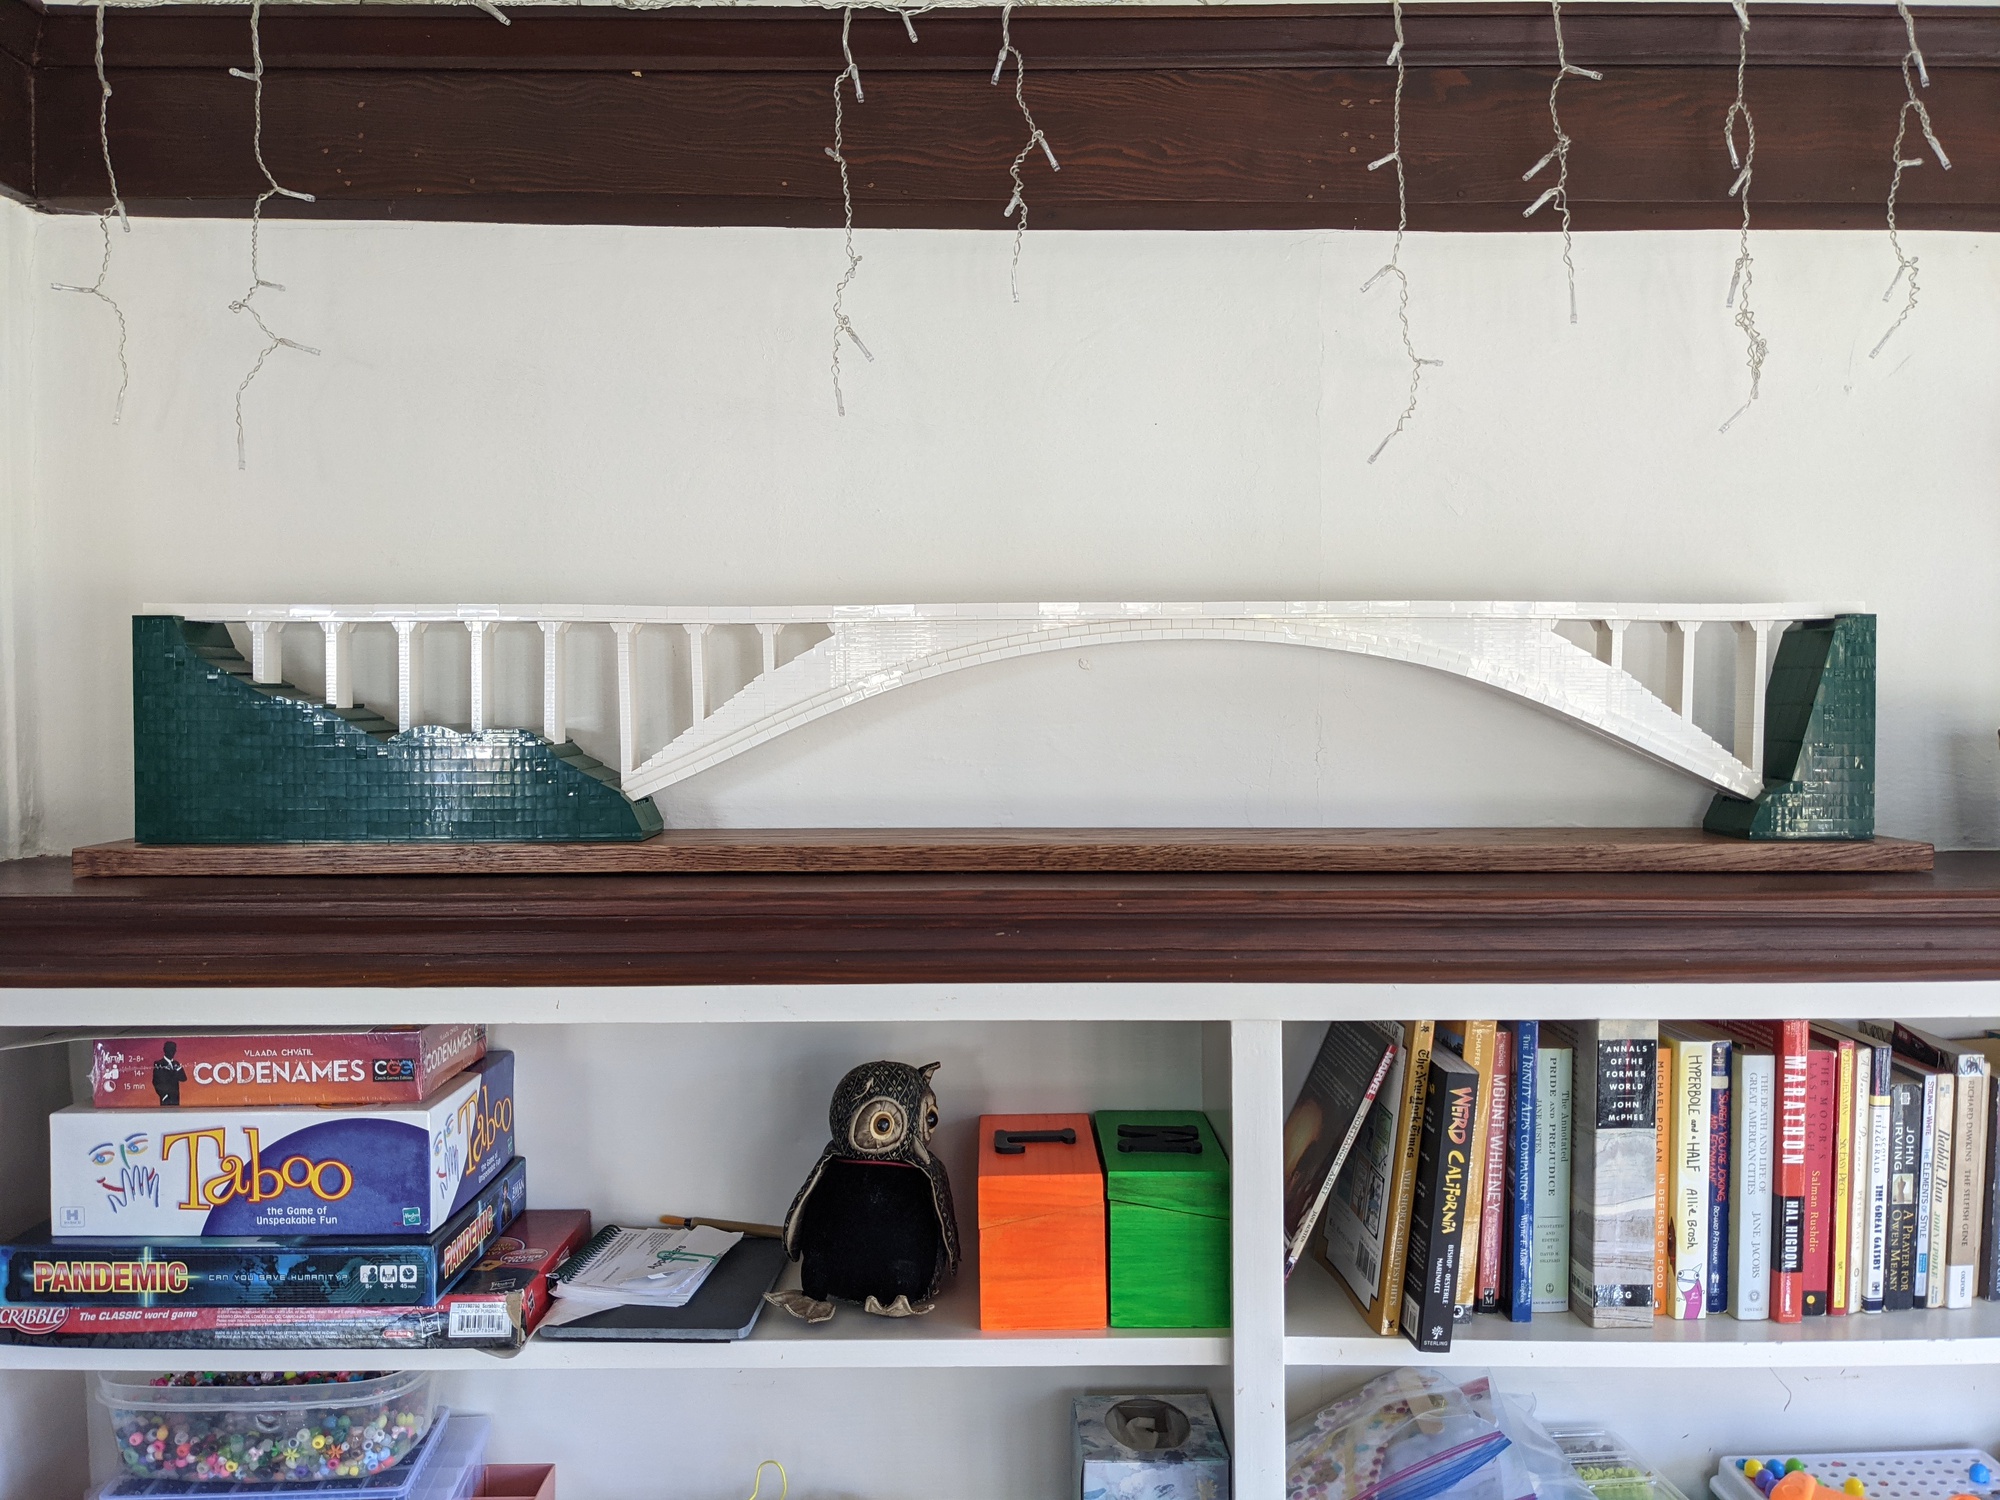
I’m very happy with how this model turned out.